Set up your gym in 10 steps
A checklist for a new FitManager gym, from branding and opening hours to plans, staff, payments, your website, members and the doors.
A new gym is ready for members once a handful of settings are in place. Work through these ten steps in order; each one links to the article that covers it in full. Most gyms finish the essentials in an afternoon.
Before you start
- You need the gym owner account, or an employee with the Manage settings permission. Most pages below live under Settings in the sidebar.
- Your gym and its first facility are created for you when your account is set up. Check that the plan shown on the workspace card at the top of the sidebar is the one you expect. See What is on my plan?
- Until every basic is done, the Overview shows a Set up your gym to get started card with shortcuts to your first member, first product and your public page. A tile turns green once it is done, and you can close the card with the cross.
Watch where everything lives first:
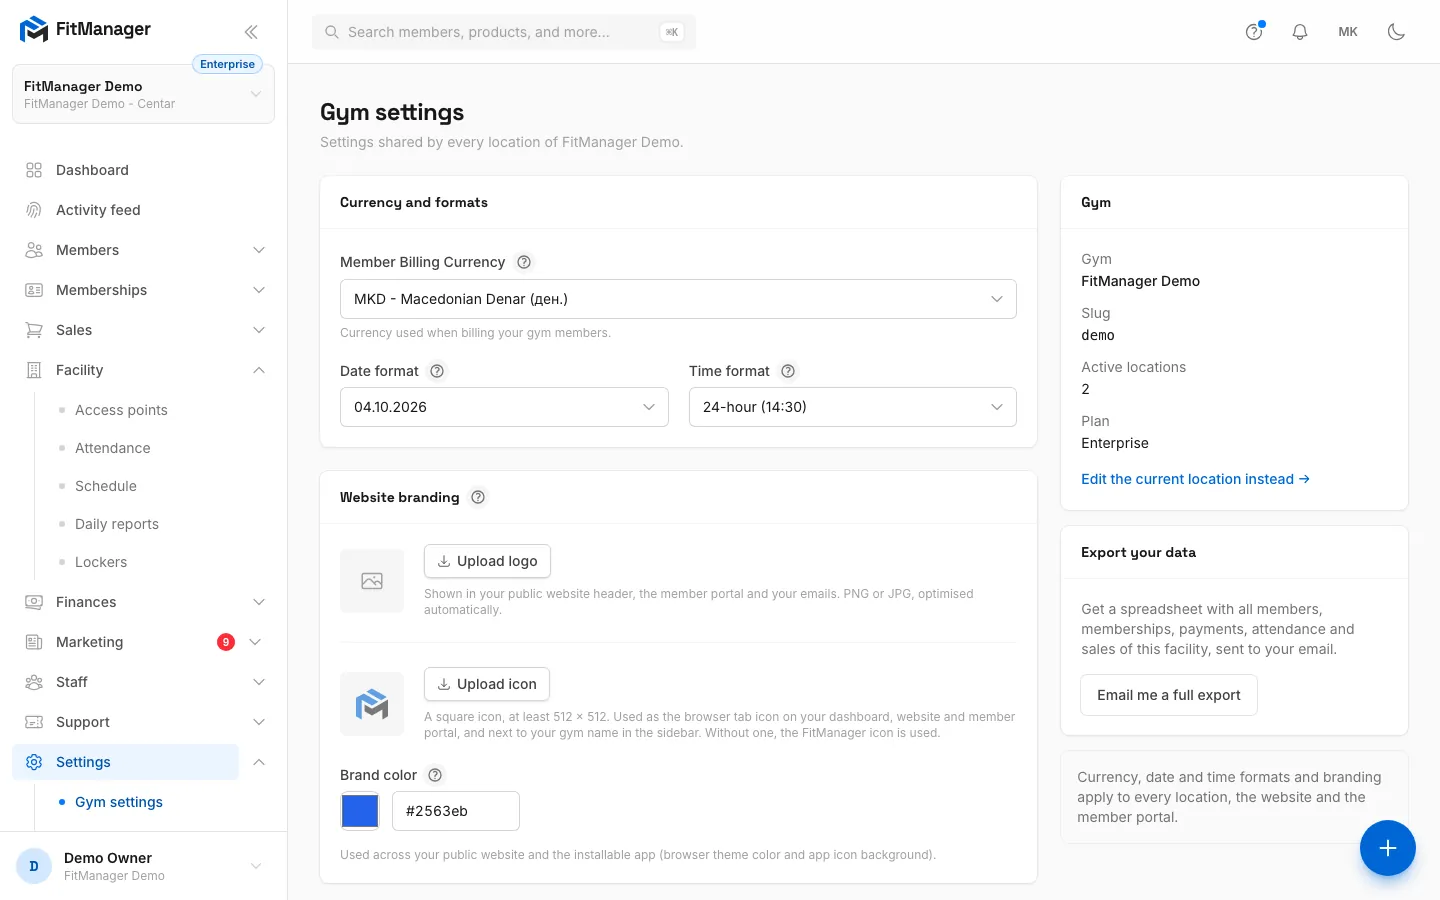
- Step 1: Start in Settings, Gym settings for currency, date formats, logo and brand colour.
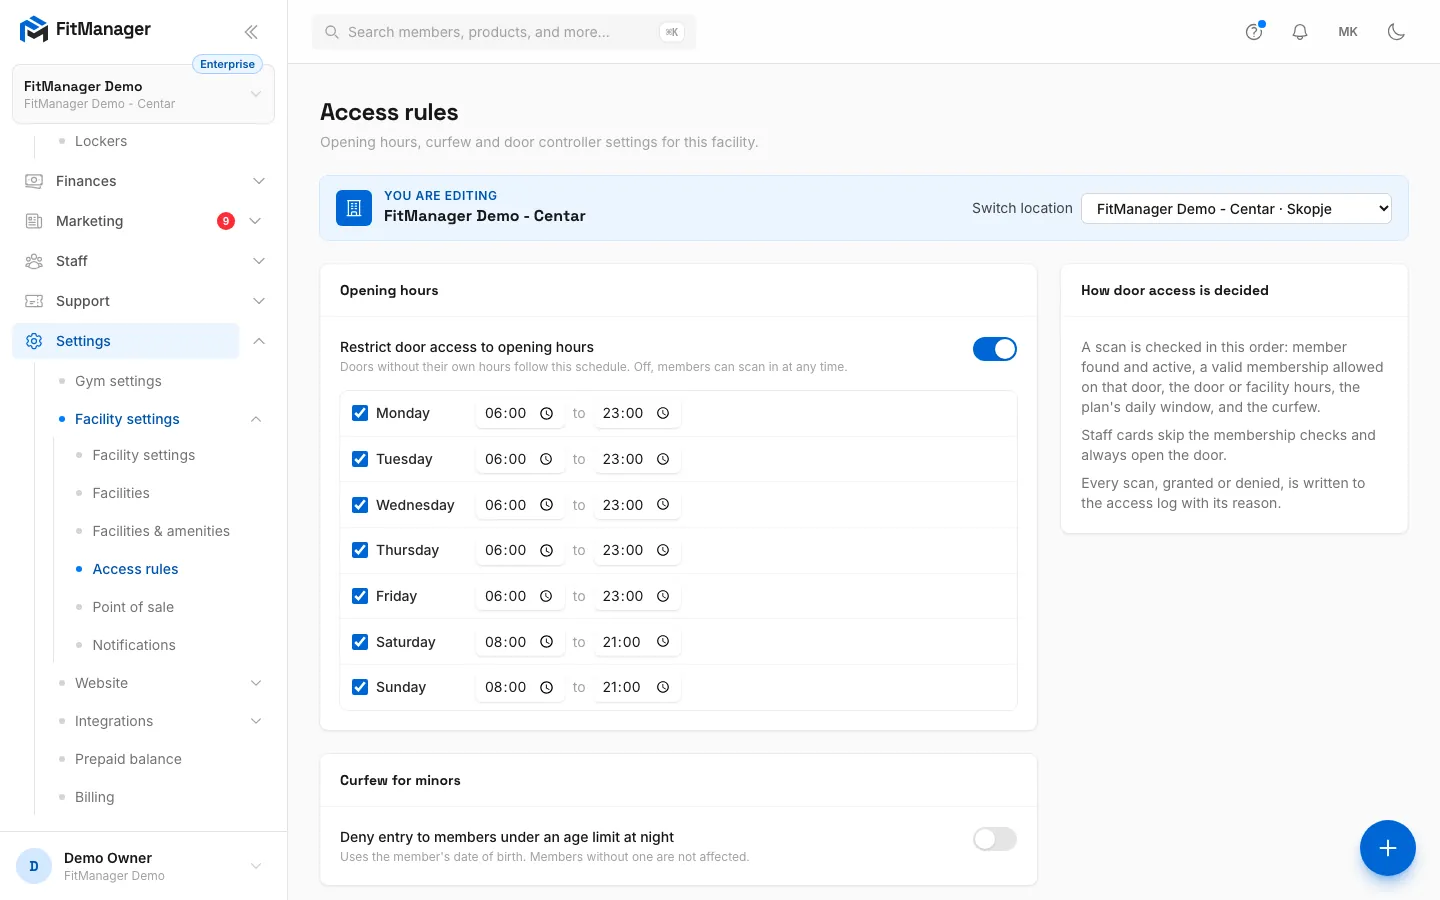
- Step 2: Access rules hold this location's opening hours and door rules.
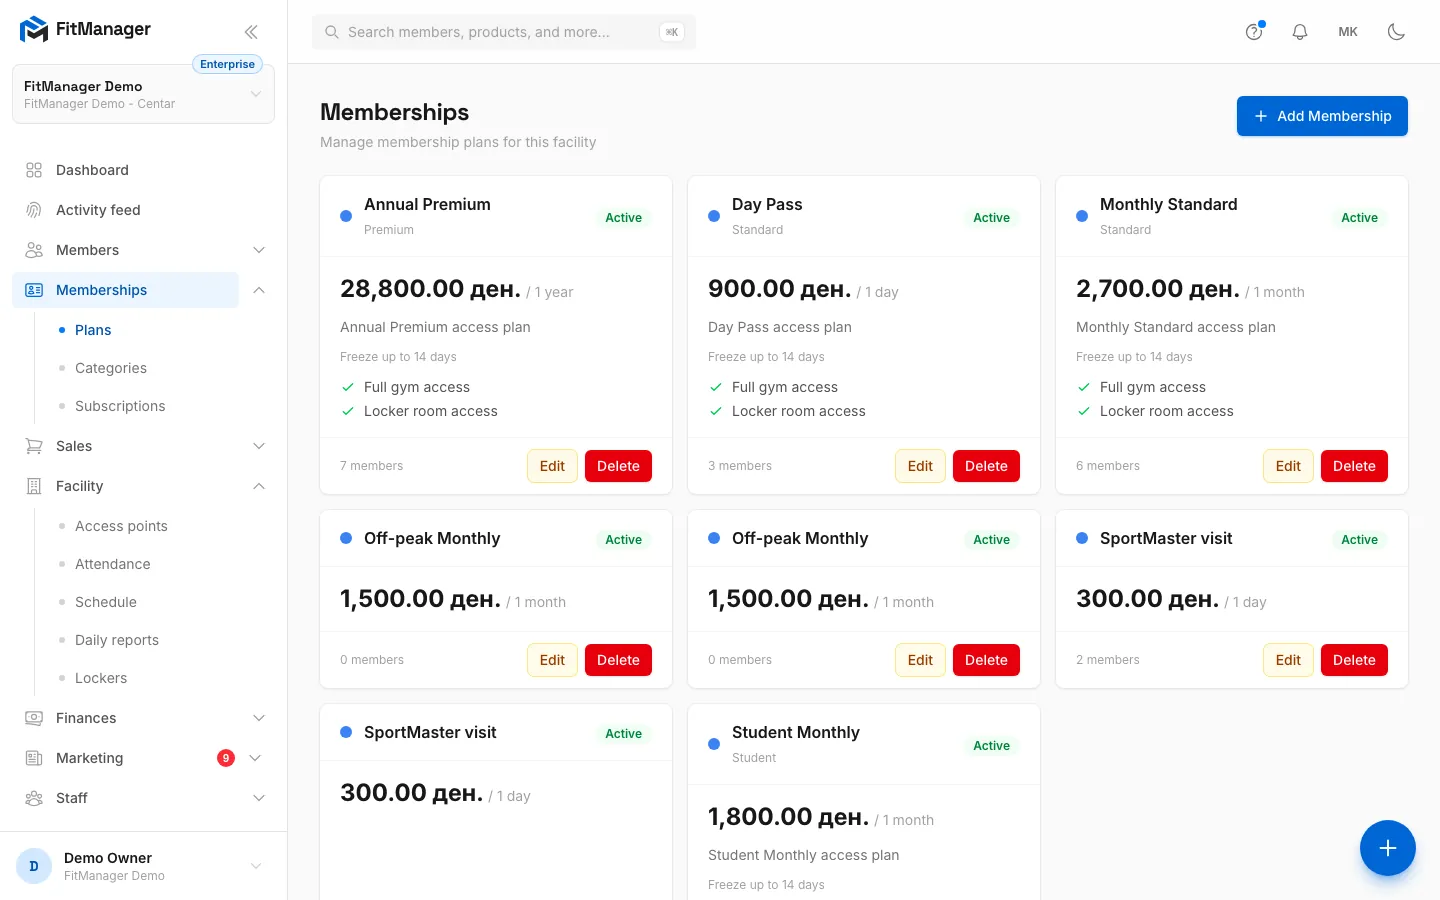
- Step 3: Under Memberships, Plans is where you create what you sell.
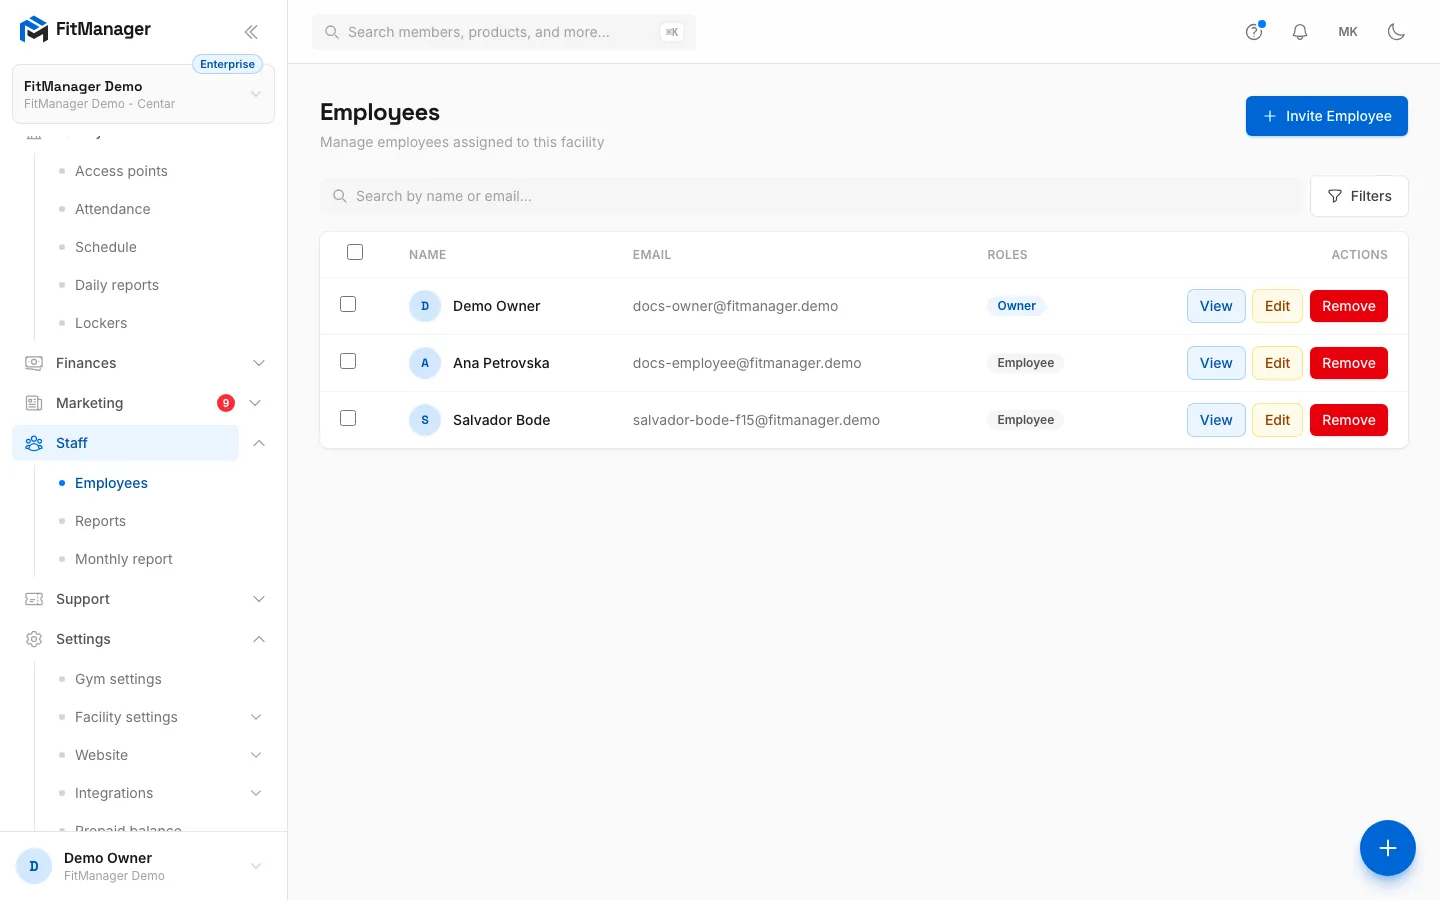
- Step 4: Invite your team under Staff, Employees.
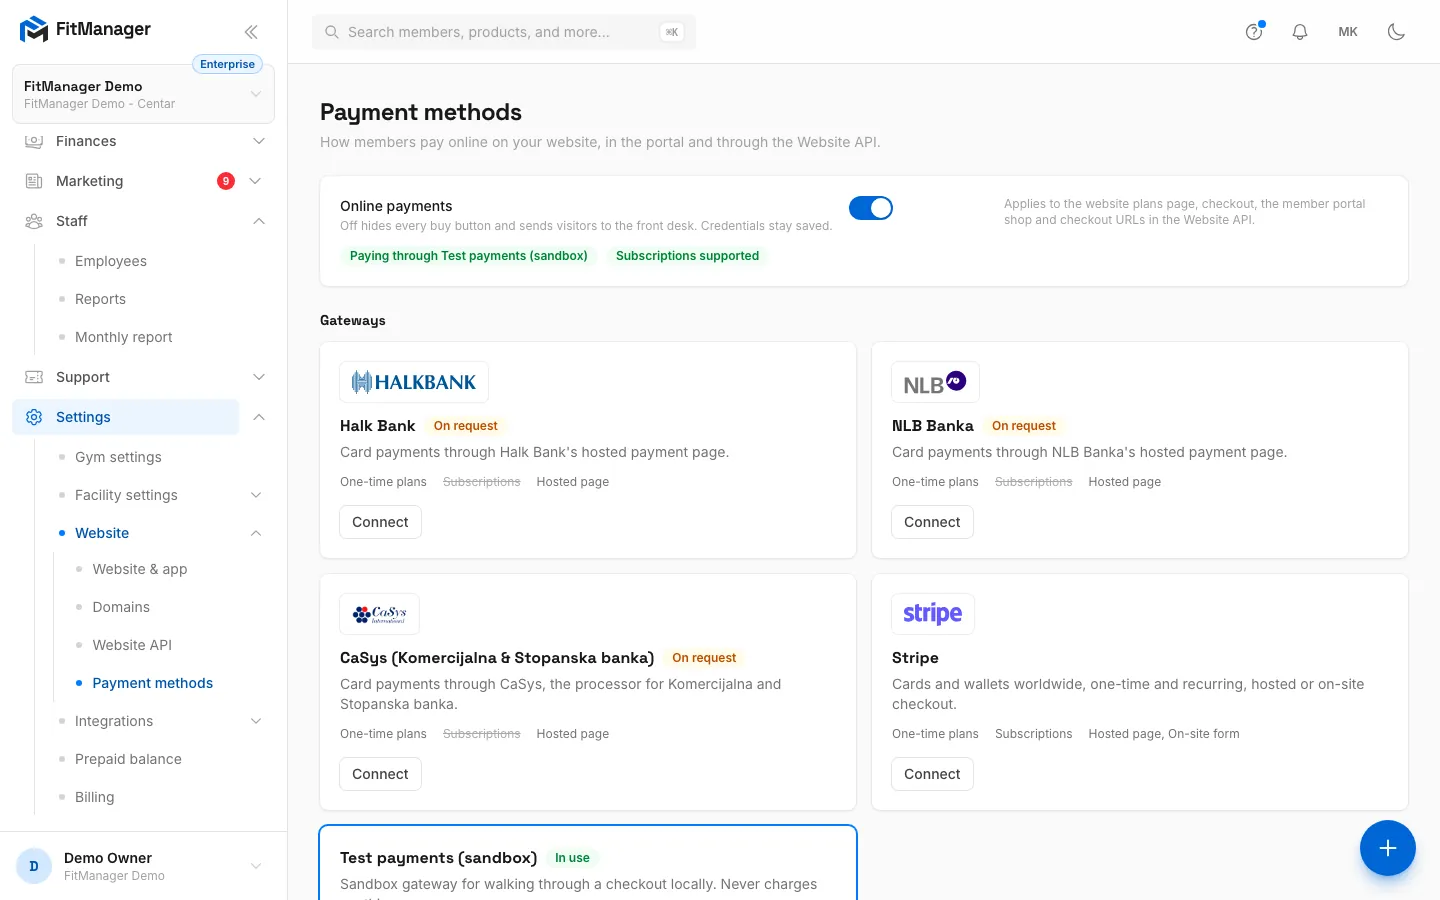
- Step 5: Payment methods decides how members pay online.
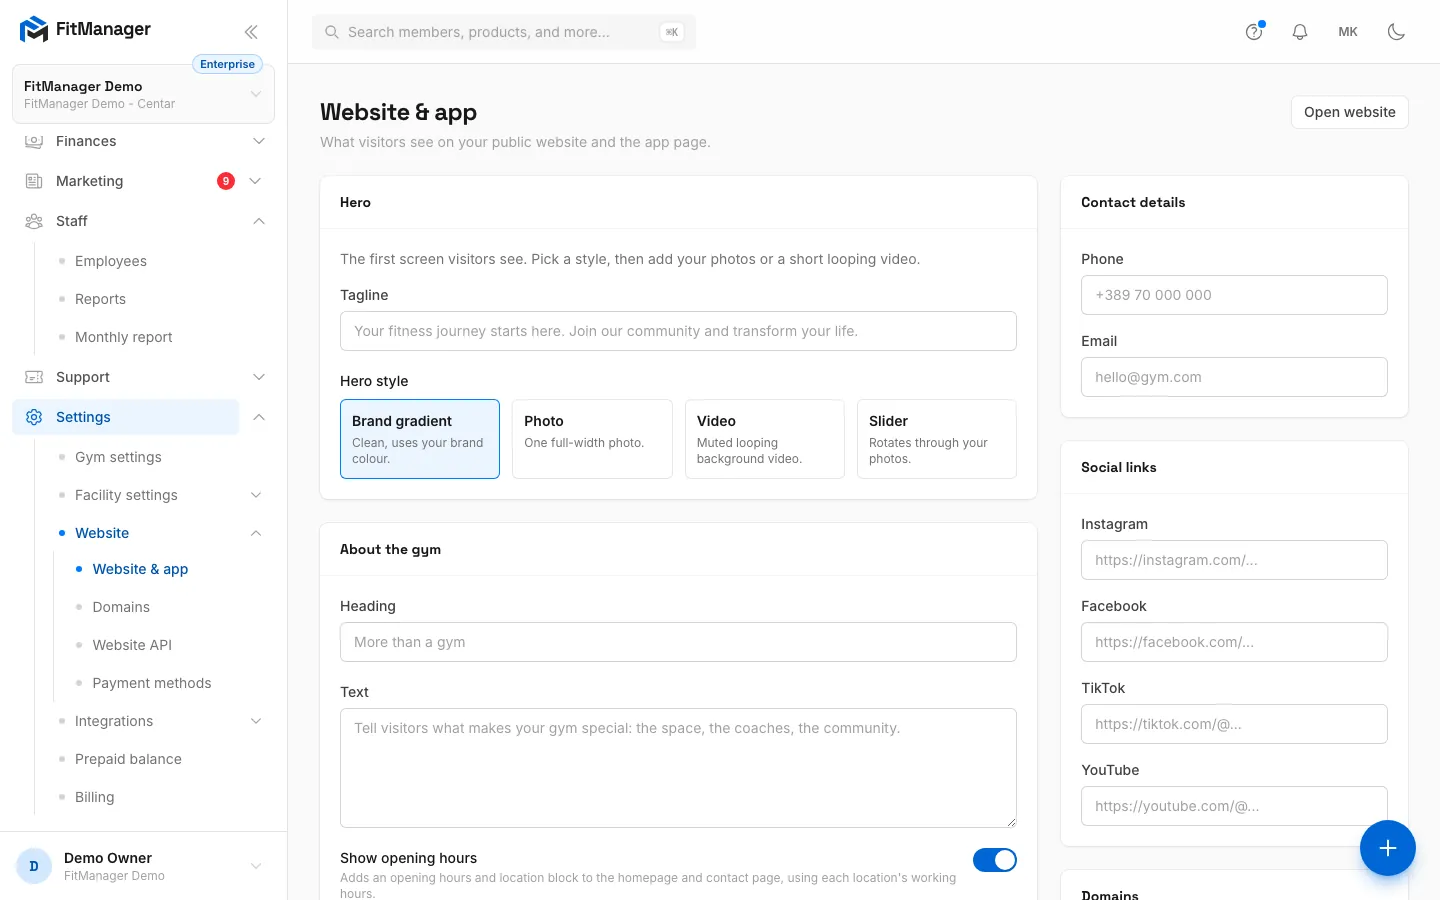
- Step 6: Website and app sets up your public website and member portal.
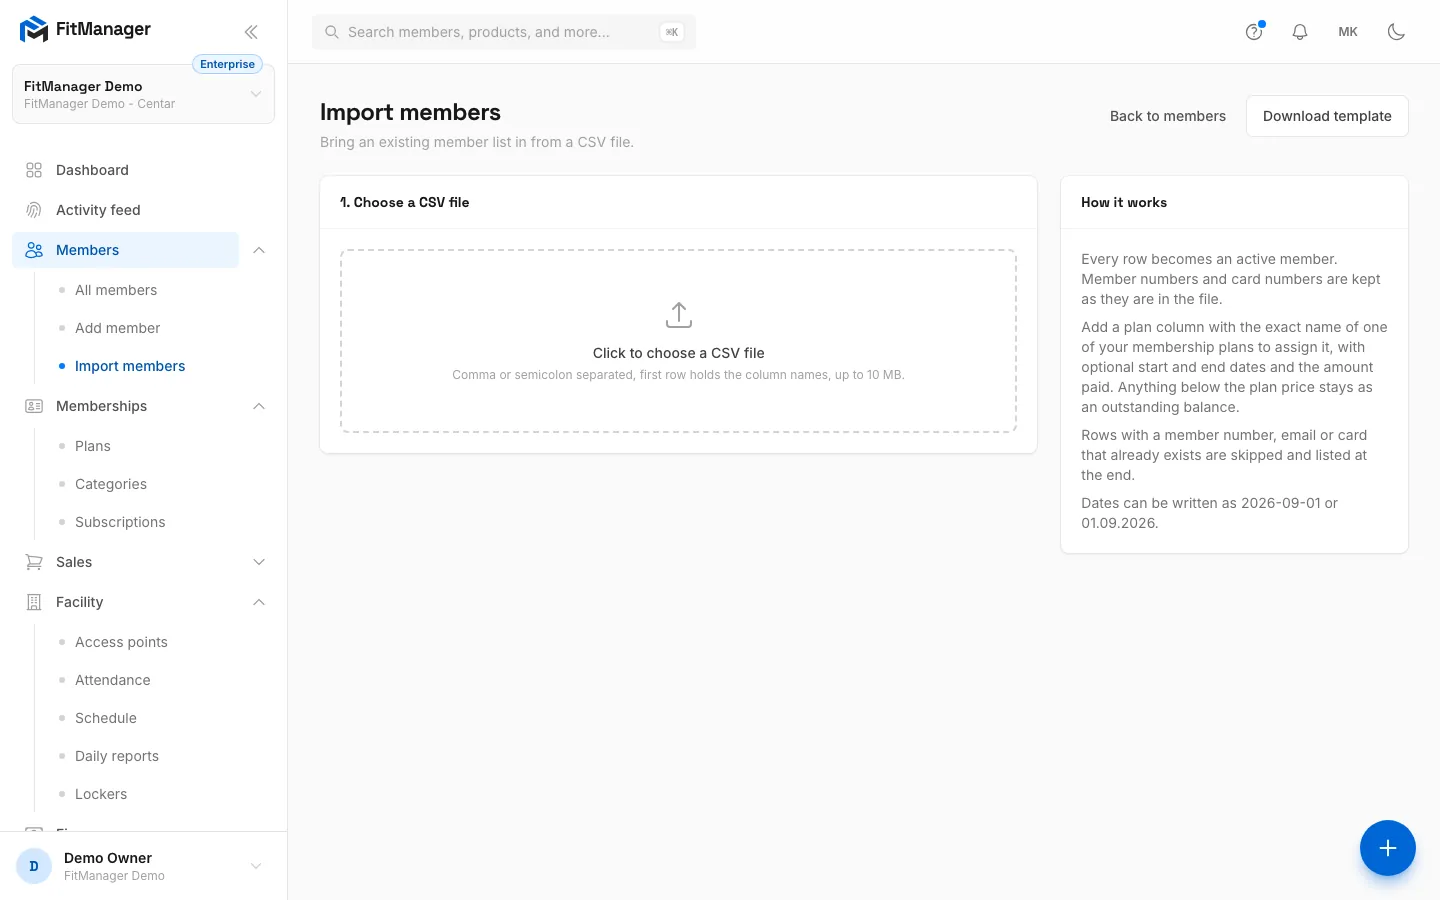
- Step 7: Bring your existing members in with Import members.
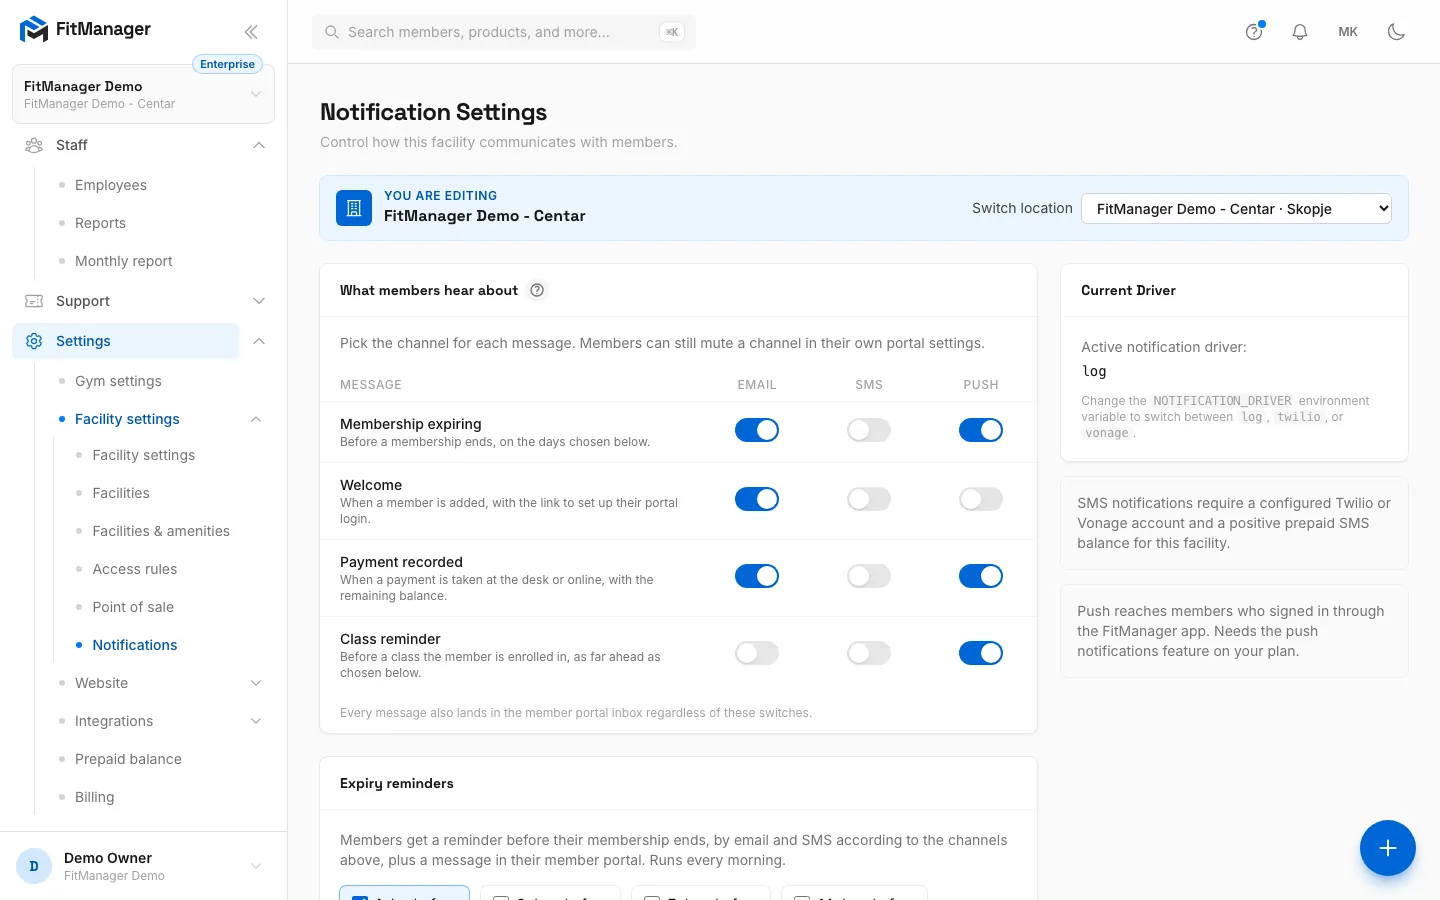
- Step 8: Notifications controls the reminders members get.
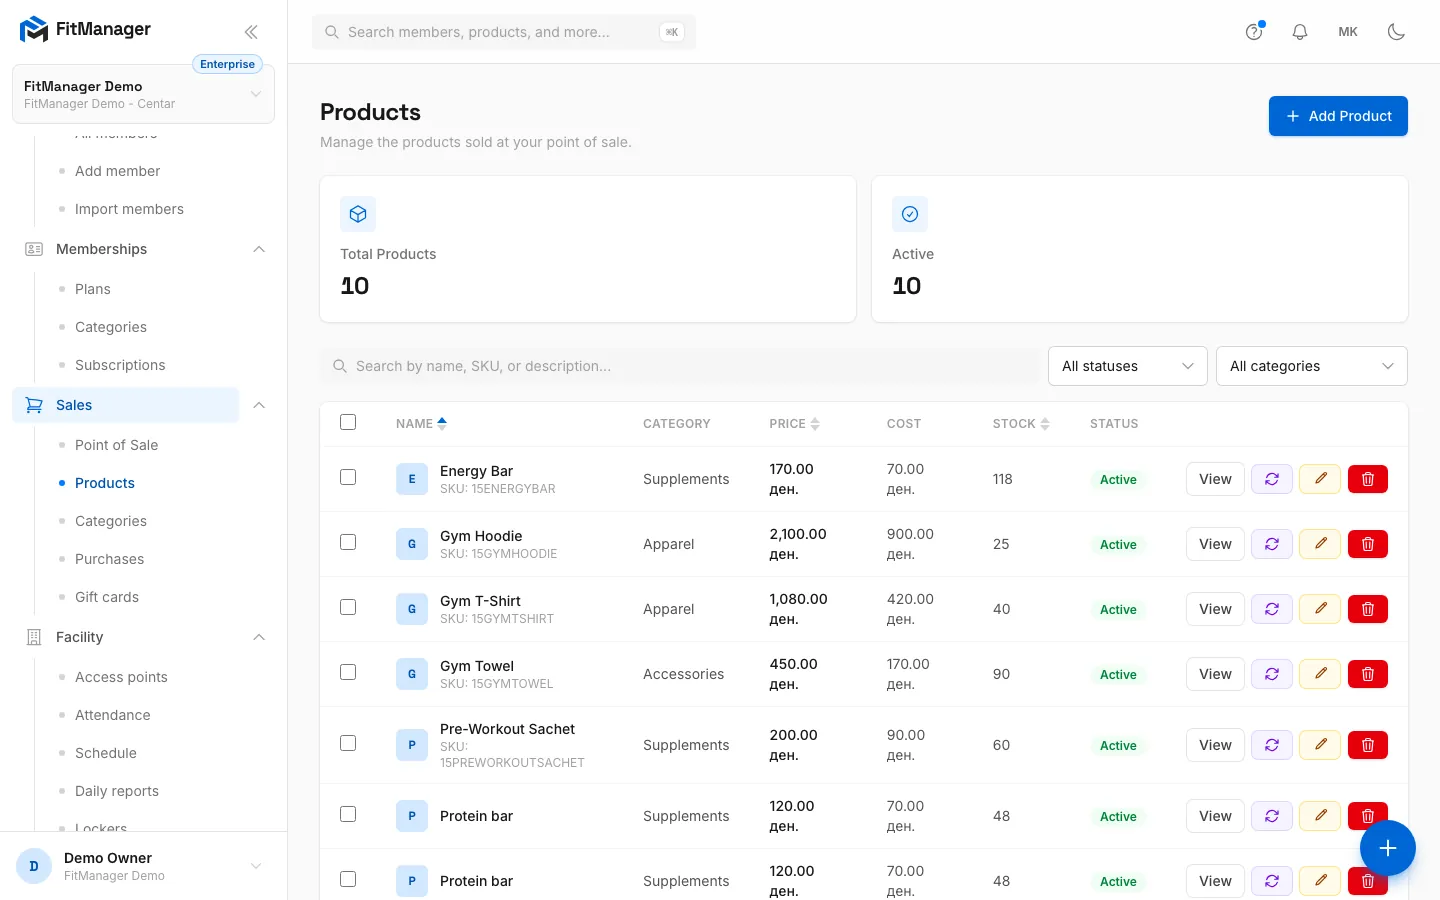
- Step 9: Add what you sell at the desk under Sales, Products.
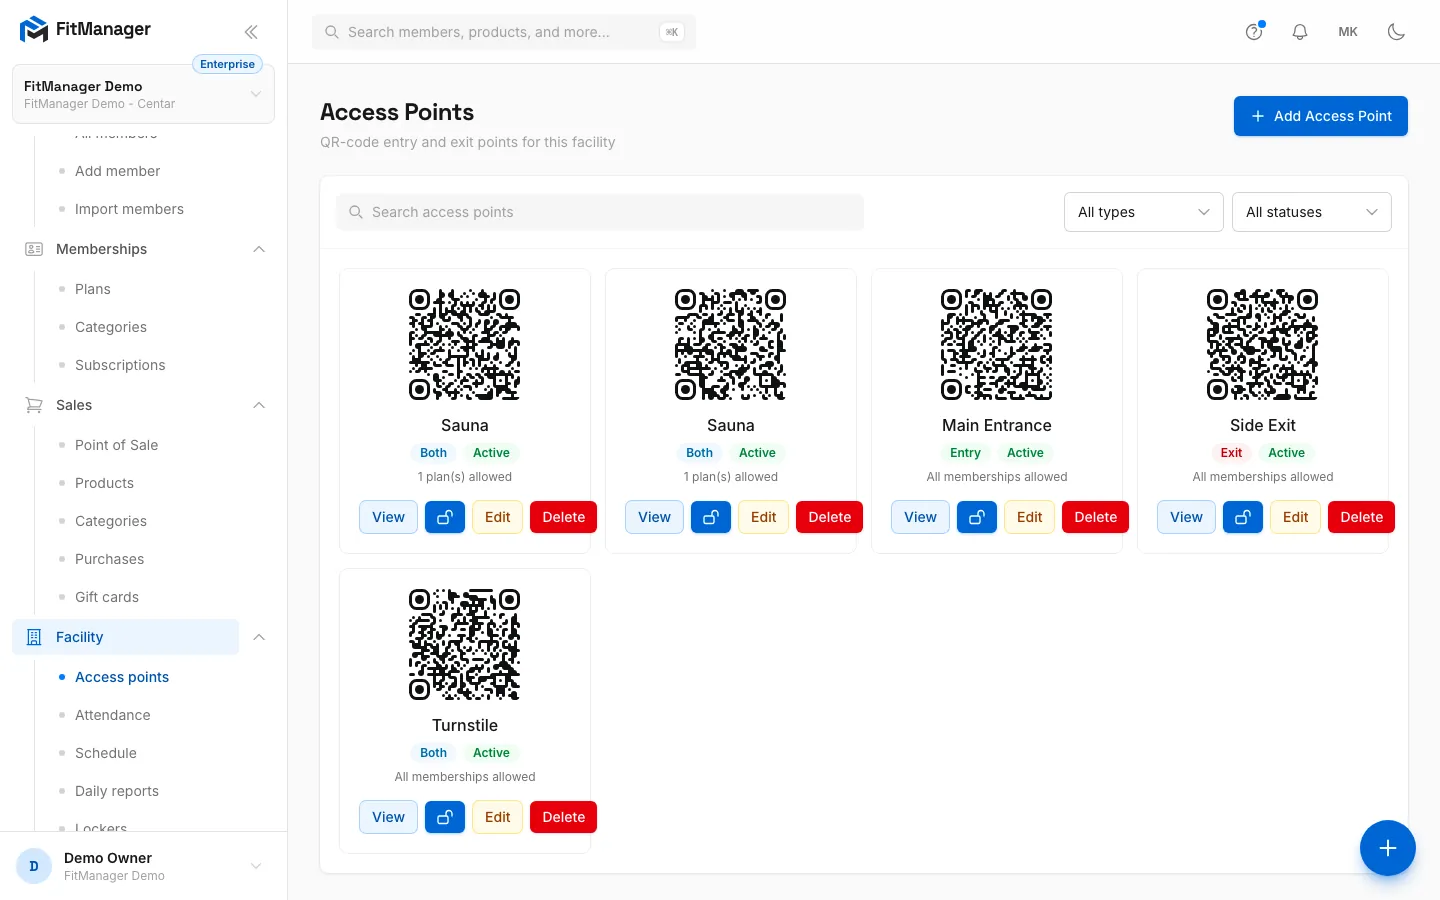
- Step 10: Finally, add your doors and turnstiles under Facility, Access points.
1. Gym settings and branding
Open Settings, Gym settings. Set the Member Billing Currency, the Date format and Time format, upload your logo and icon and pick a Brand color. These apply to every location, the website and the member portal, so do them first. Here you can also hide sidebar groups your gym does not use.
Read more: Gym settings.
2. Facility details and opening hours
Open Settings, Facility settings. Check the Facility Name, Address, City and Timezone: the timezone decides when "today" starts for check-ins and reports. Then open Access rules and set the opening hours. Members see them, and door controllers follow them.
Running more than one location? Add the others under Settings, Facility settings, Facilities. Each location needs its own licence on your plan. See Work with several facilities and Access rules.
3. Membership plans
Open Memberships, Plans and create what you sell: monthly, yearly, 10-visit cards, student plans. You set the price, how long it lasts or how many visits it includes, and the hours it gives access. Group them with Categories if you have many.
Read more: Create a plan.
4. Staff
Open Staff, Employees and invite the people who work the desk. Each employee gets an email to set their password. Decide which facilities they work in and what they may do.
Read more: Invite an employee and Permissions.
5. Payment methods
Open Settings, Website, Payment methods to let members pay online on your website and in the portal. Stripe is the gateway that charges today; bank gateways are connected on request. If you only take payments at the desk, leave Online payments off.
Read more: Online payments with Stripe and Bank gateways.
Requires: Gym website
6. Your website and member portal
Open Settings, Website, Website & app. Add your tagline, photos and about text, choose a theme and decide which pages to show. Use Preview website in the workspace card menu to see the result.
Read more: Your gym website and The member portal.
Requires: CSV member import
7. Bring in your members
Moving from a spreadsheet or another system? Open Members, Import members, download the template, fill it in and upload it. Members can come in with their current plan and dates. For a few people, add them one by one with Add member.
Read more: Import members from a CSV file and Add a member.
8. Notifications
Open Settings, Facility settings, Notifications and choose which reminders members get, for example before a membership expires, and by which channel. To send email from your own address, connect Brevo; for SMS, top up the facility's prepaid balance.
Read more: Member notifications, Connect Brevo and SMS and prepaid balance.
Requires: Point of sale
9. Products and the till
Open Sales, Products and add what you sell at the desk: drinks, supplements, towels, day passes. Then check Settings, Facility settings, Point of sale for how the till behaves. If you print fiscal receipts, set up the fiscal printer too.
Read more: Products, Sell at the POS and Fiscal printer.
Requires: Access control
10. Doors and devices
Open Facility, Access points and add each door, turnstile or gate. Install FitManager Control on a computer at the gym to connect them. Members then get in with their QR code, card or code.
Read more: Access points, FitManager Control and Codes, cards and QR.
When you are done
- Sell a first membership to a test member and check them in, to see the whole flow end to end.
- Have each staff member secure their account with two-factor authentication.
- Stuck on a step? Open a support ticket and we will help.
Was this page helpful?
Related articles
Still stuck?
Write to us and we will get back to you within one working day.