The member list and profile
Find members fast, read everything on a member's profile and take payments, visits and memberships from one place.
The Members page is where the front desk spends most of its day. It lists every member of the current facility, and each name opens a profile with their details, memberships, payments, visits and door history.
Before you start
You need the View members permission. Owners and employees have it by default. Some parts of the page also depend on other permissions, noted below.
The member list
At the top, five figures summarise the facility: Total Members, Active, Inactive, New This Month and Outstanding balance (money members still owe on their memberships, shown in red when above zero).
Search and filters
- The search box matches first and last name, member code, email, phone and card number. Partial matches work, and you can type the code with or without its dash.
- If a USB card reader is plugged in, tap a member's card anywhere on the page and their profile opens. Unknown cards show No member found for card or code.
- Filters opens a panel with Status, Membership plan, Gender, Joined between, Active membership expiring within 30 days and With outstanding balance. Click Apply Filters. Each active filter shows as a chip under the search box; click a chip to remove it, or Clear all.
- Click the Member, Status or Joined column headings to sort. The list shows 100 members per page.
Each row shows the member's current plan and when it expires (or No membership), plus their status badge.
Row buttons
| Button | What it does | Permission |
|---|---|---|
| Pay | Opens the member's active plan, membership history and balances. From there you can record a payment or assign a new membership. | View plans (assigning and recording payments needs Manage plans and categories) |
| Visits | Opens the attendance calendar for that member. | View attendance |
| View | Opens the profile. | |
| ... | Edit or Delete the member. | Edit members / Delete members |
Tick the boxes on the left to select members, then use Export or Delete in the bar that appears. See Export lists.
The profile
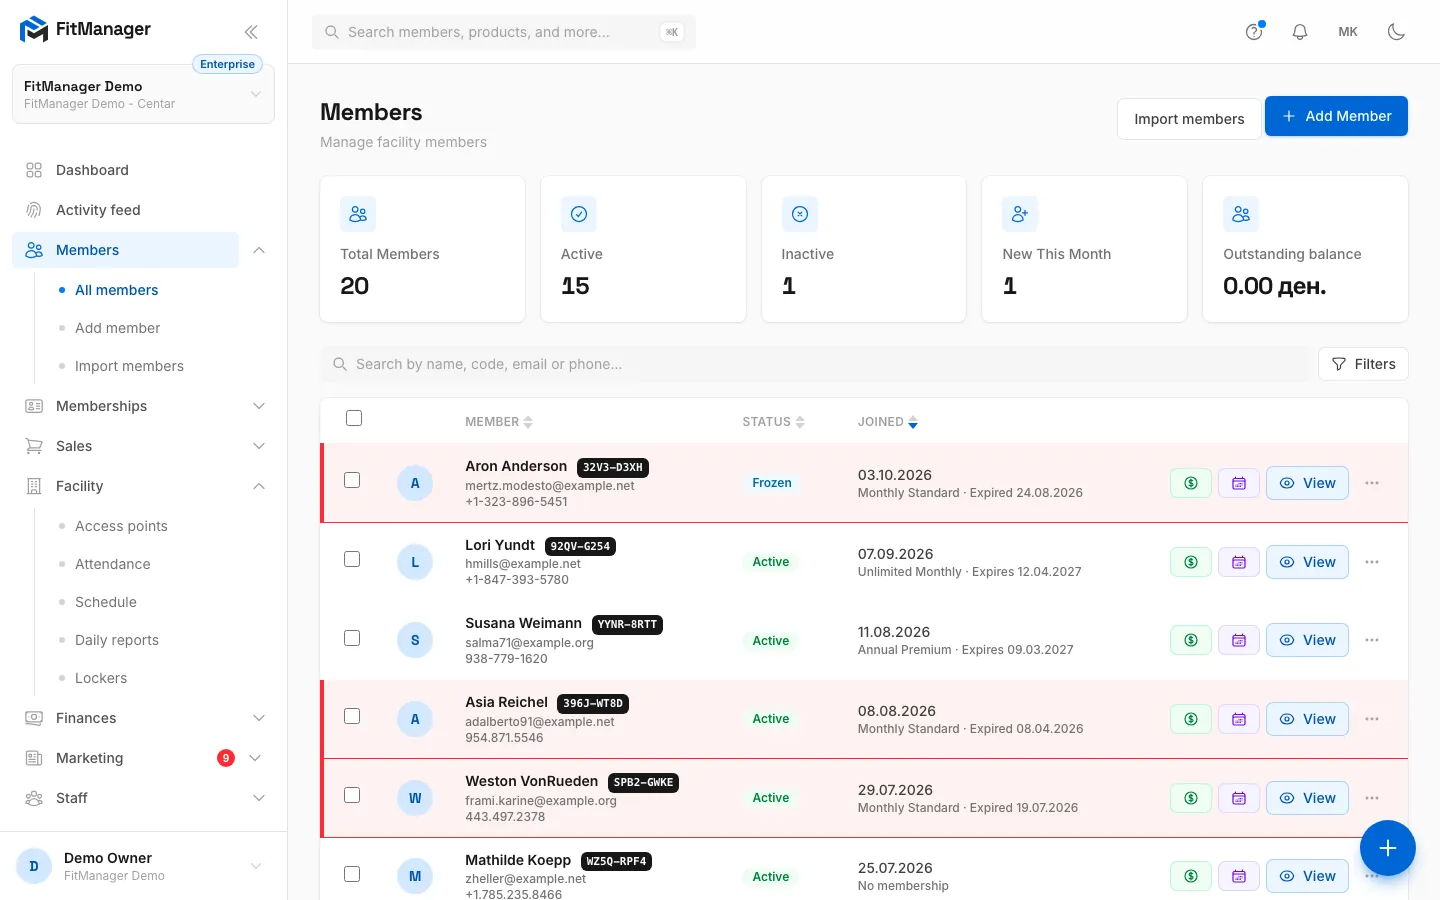
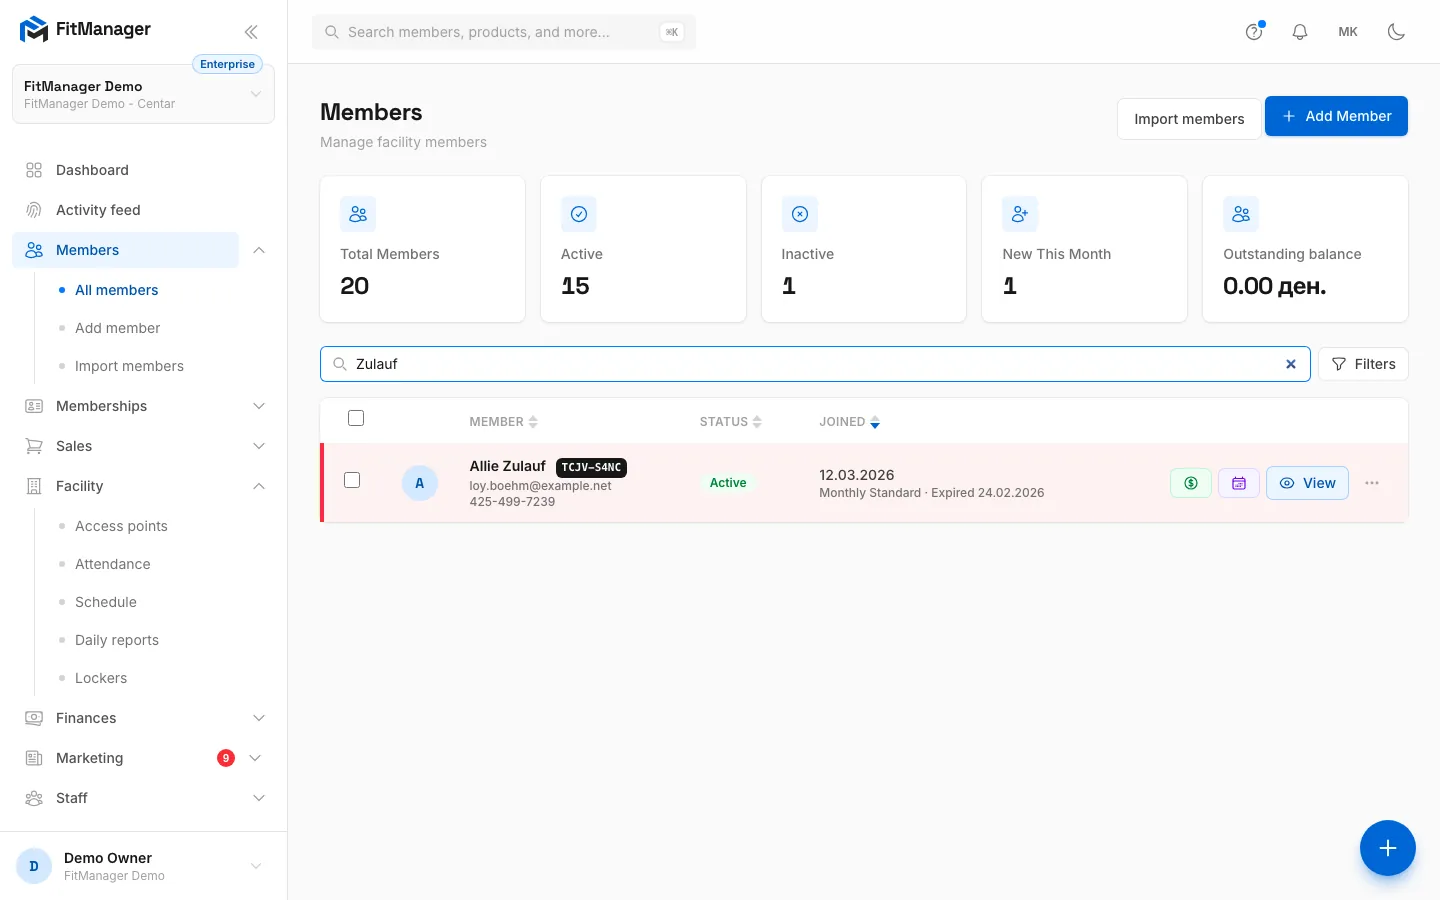
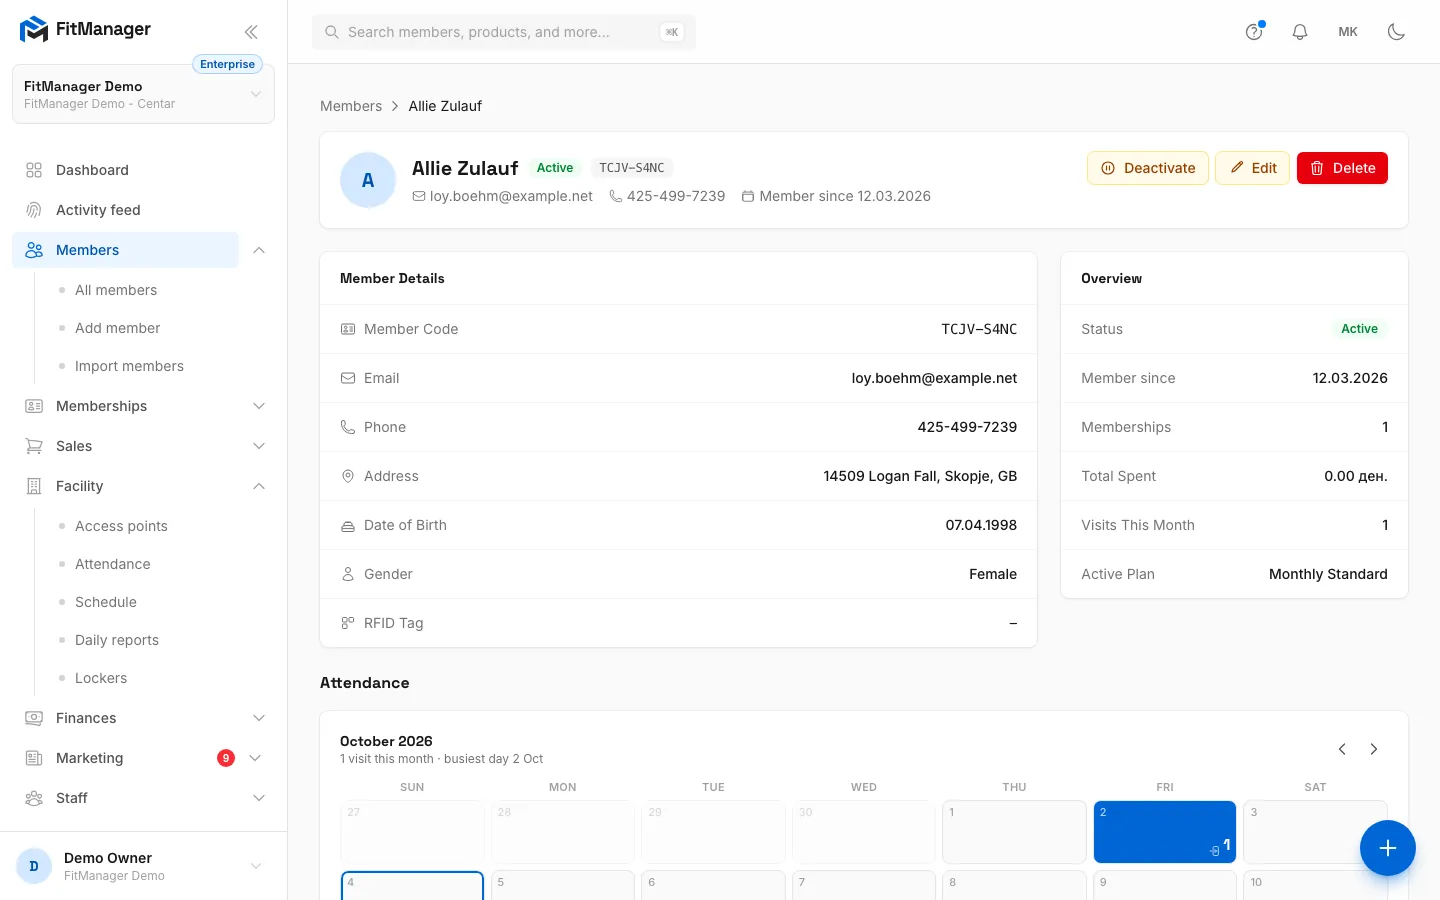
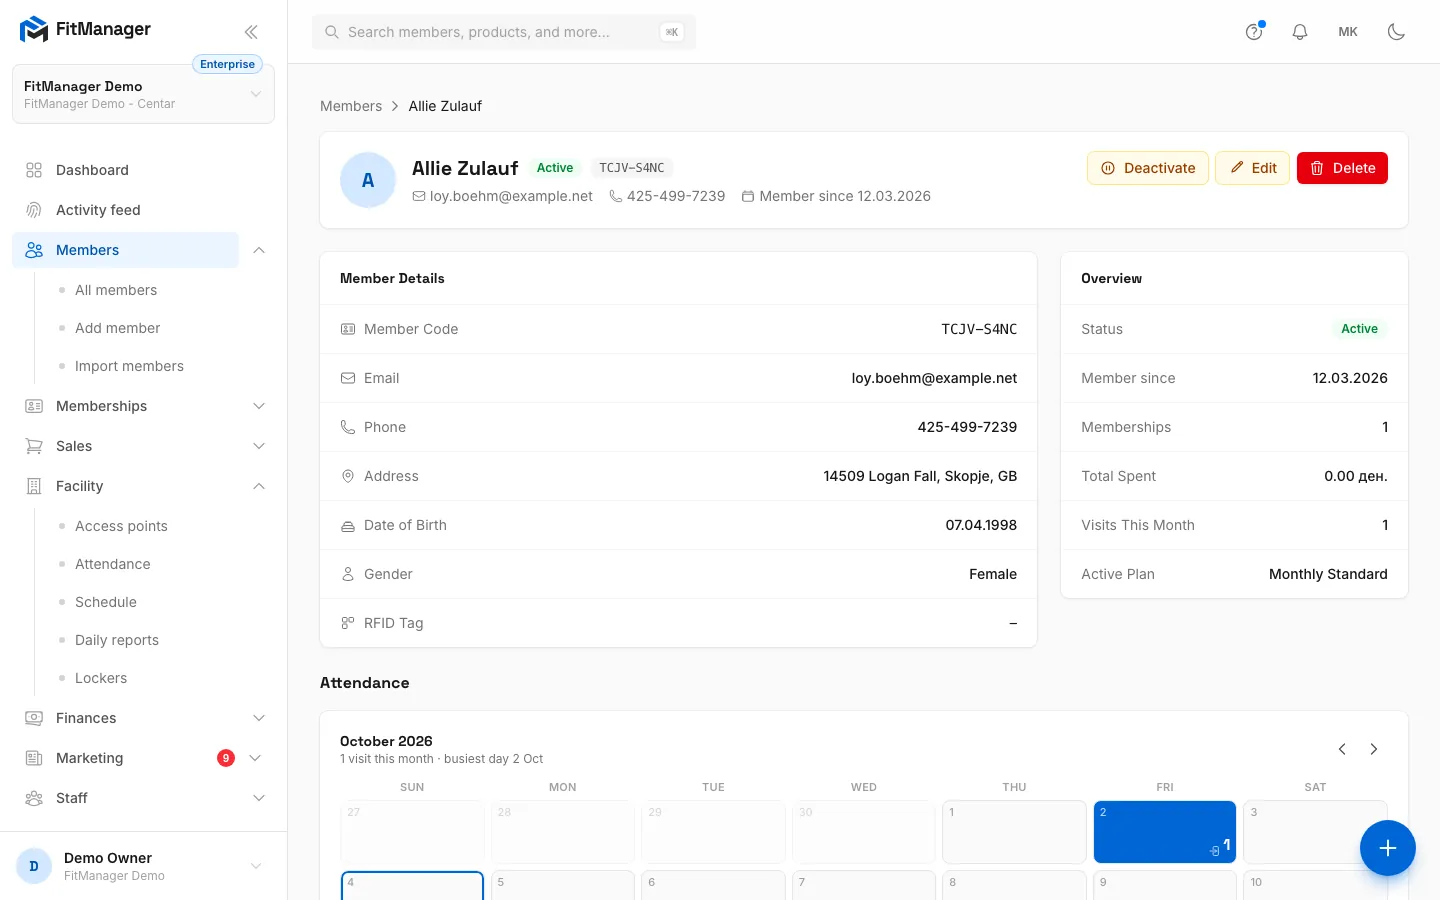
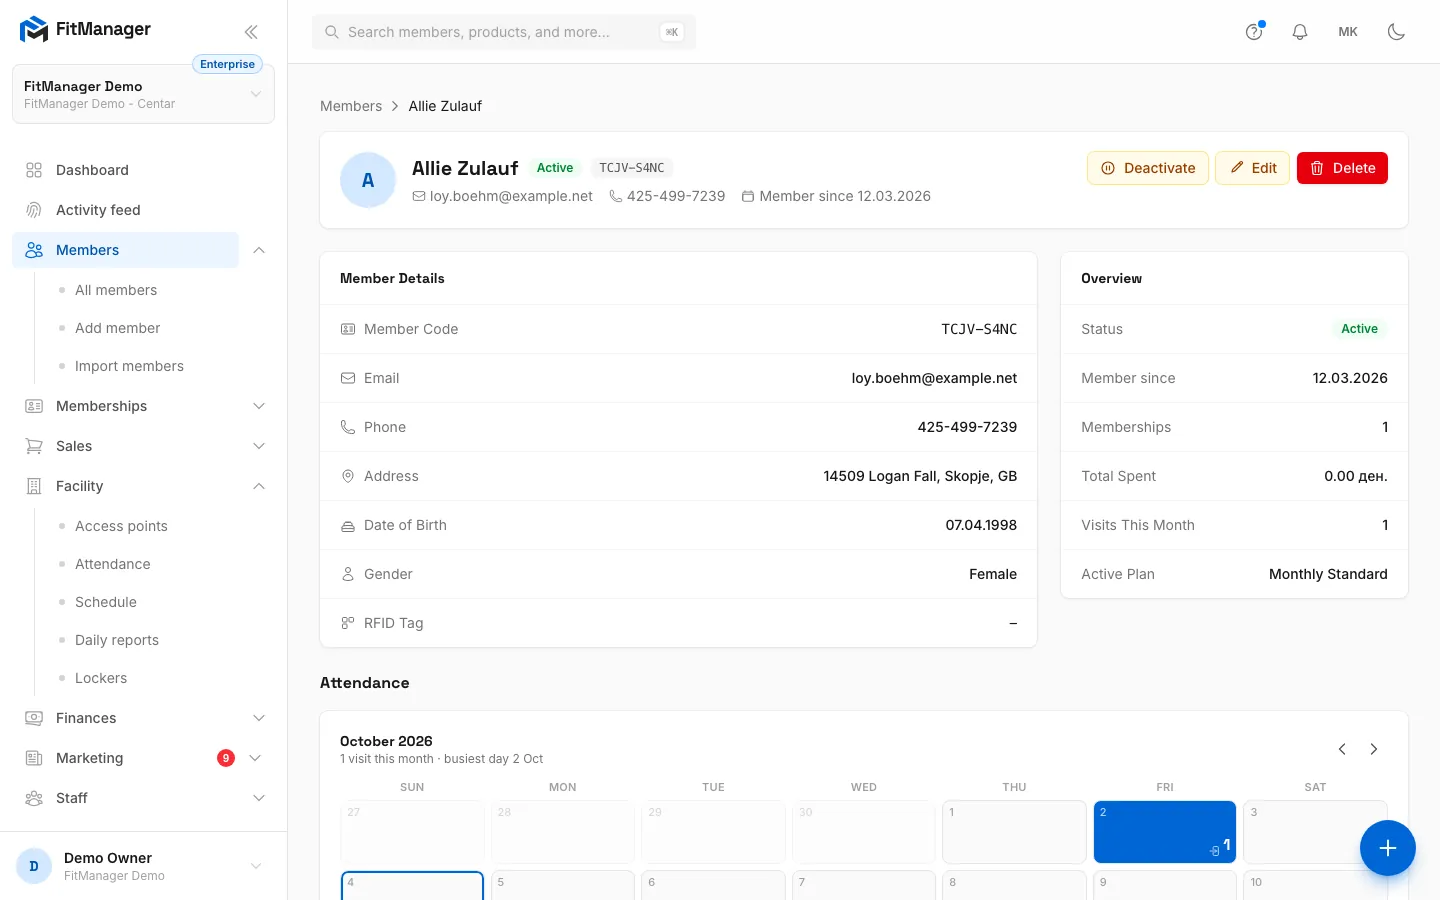
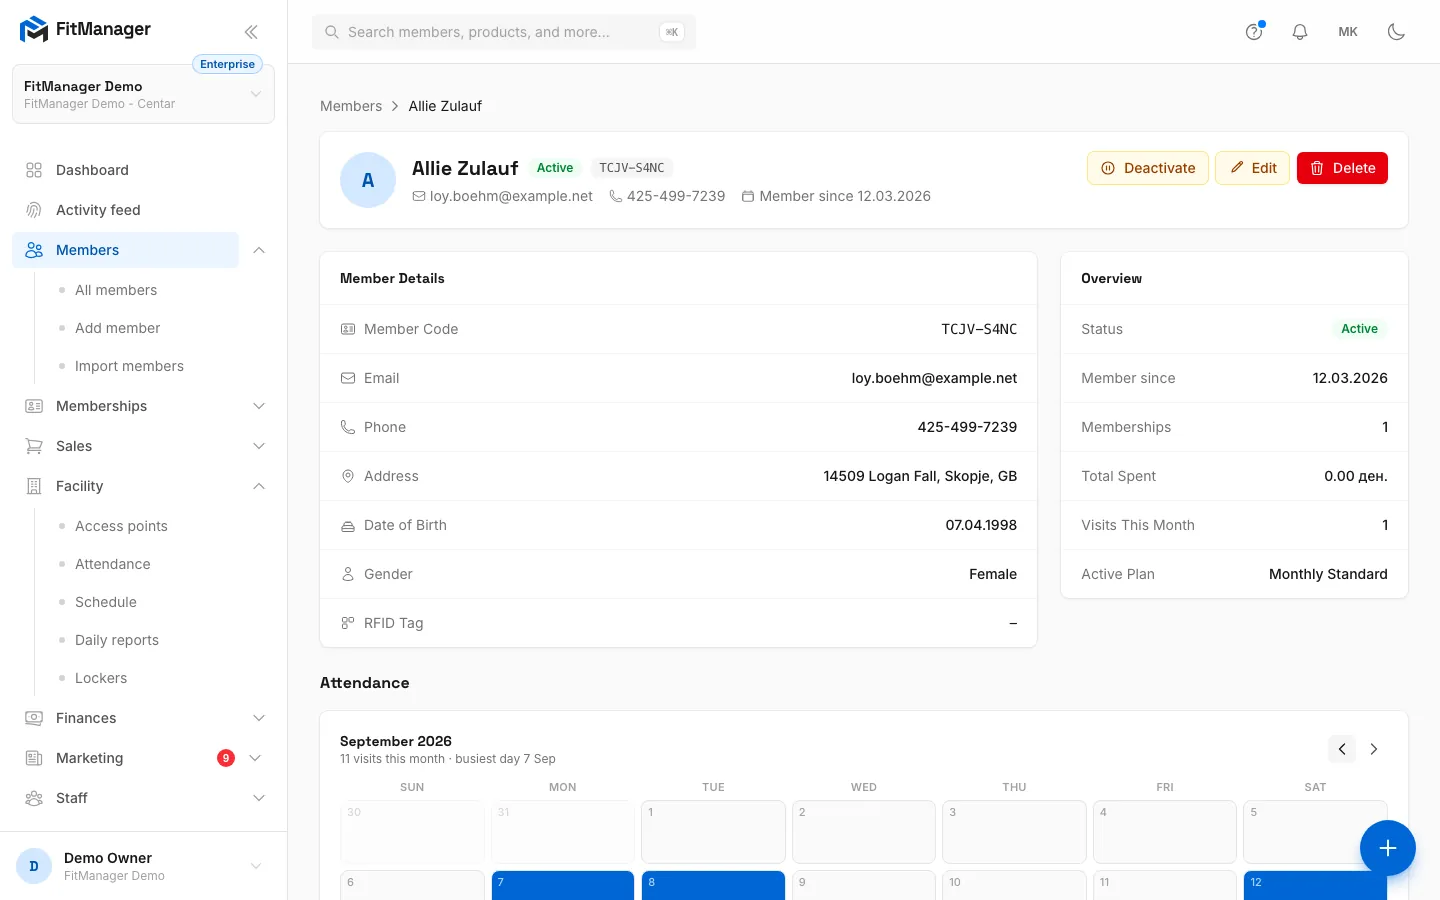
- Step 1: On the Members page, search for the member by name, code, email or phone.
- Step 2: Click View to open their profile.
- Step 3: Member Details holds the member code, contact details, date of birth and RFID tag.
- Step 4: Overview sums up their status, memberships, total spent, visits this month and current plan.
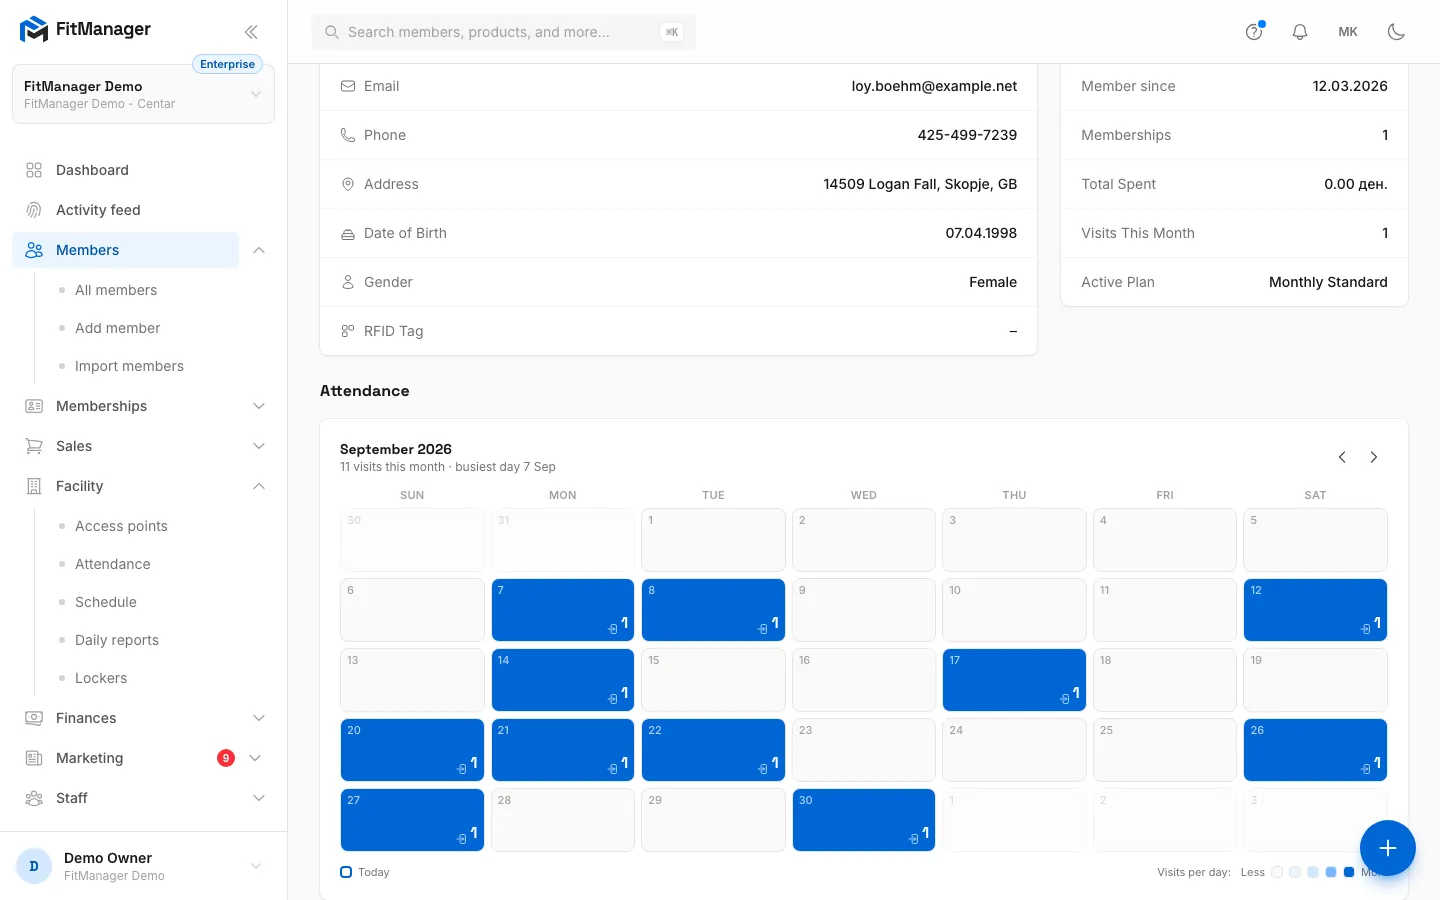
- Step 5: The Attendance calendar shows their check-ins. Use the arrows to go back a month.
- Step 6: Darker days mean more visits. The visit count and busiest weekday are above the calendar.
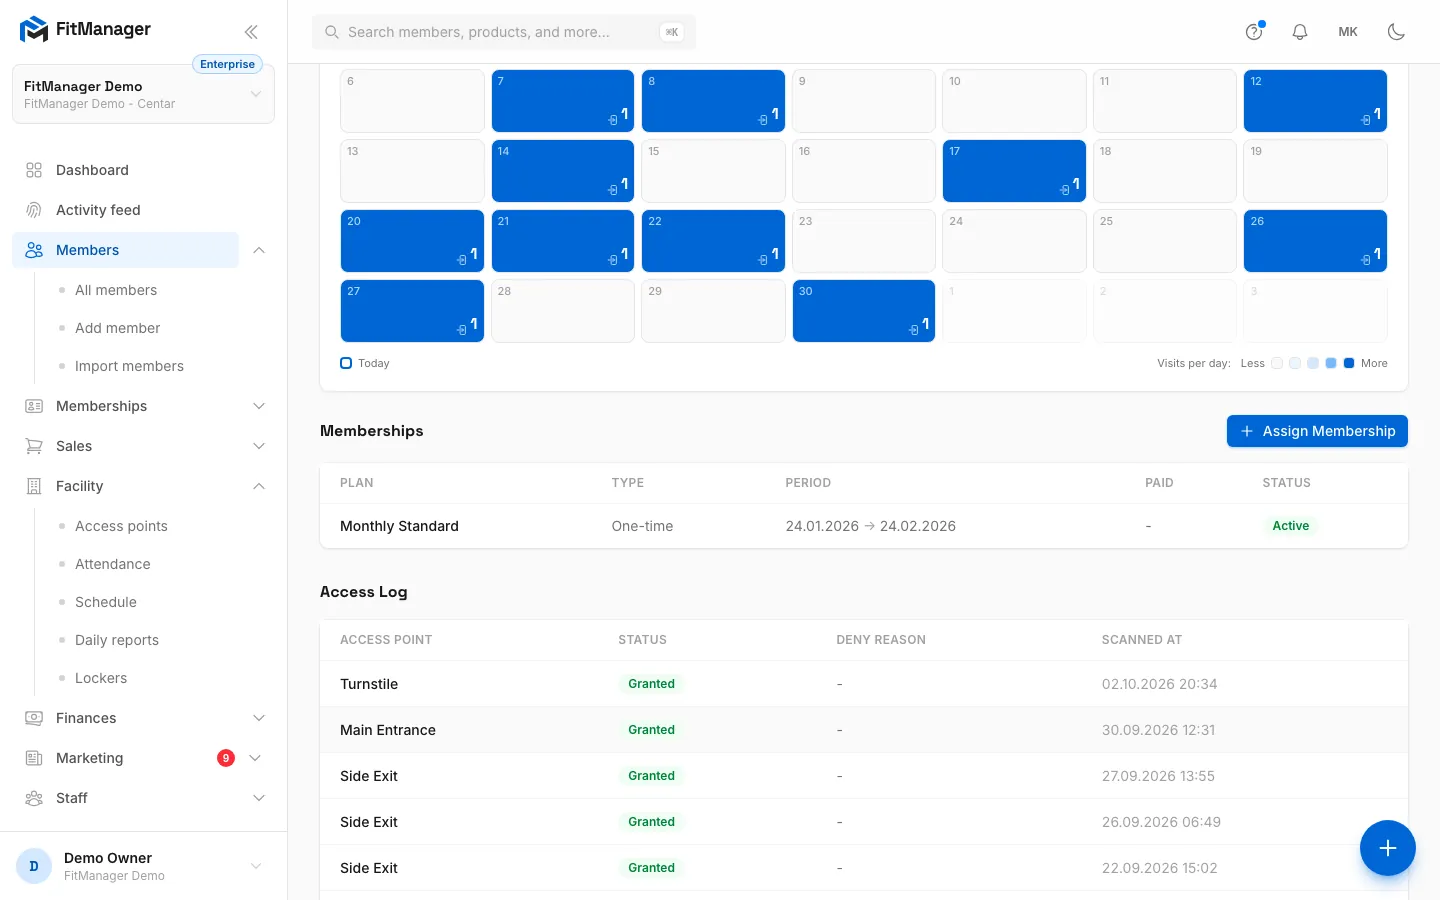
- Step 7: Memberships lists every plan with its period, what was paid and its status. Record payment takes what is still owed.
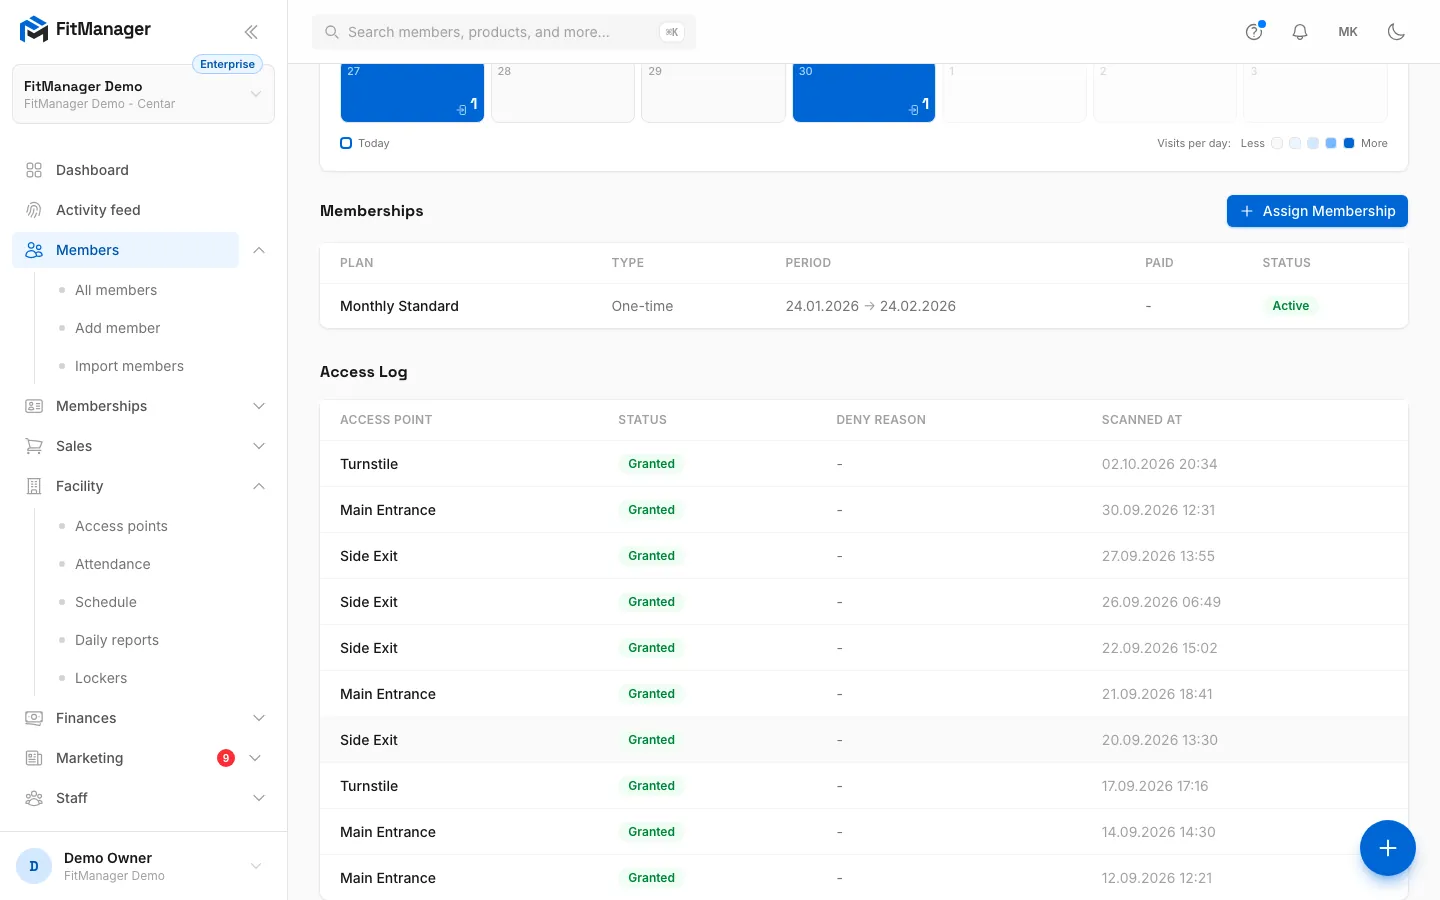
- Step 8: The Access Log shows every door scan, granted or denied, with the reason.
- Step 9: Back at the top, Deactivate, Edit and Delete change the member, depending on your permissions.
Header
The top card shows the member's name, status badge, member code (for example ABCD-EF23), email, phone and Member since date. The buttons on the right are Deactivate (or Activate), Edit and Delete, depending on your permissions. See Edit, deactivate or delete a member.
Member Details
Member Code, Email, Phone, Address (address, city and country together), Date of Birth, Gender and RFID Tag. Notes appear at the bottom when the member has any. A dash means the field is empty.
Overview
| Line | Meaning |
|---|---|
| Status | The member's status. Only Active members get through the door. |
| Member since | The date the profile was created. |
| Memberships | How many memberships the member has had. |
| Total Spent | The total of their membership payments. POS sales are not included. |
| Visits This Month | Check-ins since the first of the month. |
| Active Plan | The plan they are on now, or a dash. |
Attendance
A month calendar of the member's check-ins. Use the arrows to move between months. The count of visits and the member's busiest weekday are shown above the calendar.
Memberships
Every plan the member has had, newest first, with Plan, Type (One-time or Subscription), Period, Paid and Status.
- Paid shows the amount paid against the price, for example
1,000 / 1,800. A Partially paid, Unpaid or Overdue badge means money is still owed. Click Record payment to take the rest: enter Amount received, pick the Payment Method (Cash, Card or Bank transfer), add an optional Note and click Record payment. The amount cannot be more than what is owed, and the member gets a notification in their portal. - Visit packs show how many visits are left, for example 6 of 10 visits left. Click Adjust to correct the pack size or the visits used, for example after a missed scan.
- Assign Membership adds a new plan. See Assign a membership.
Recording payments, adjusting visits and assigning memberships need the Manage plans and categories permission.
Access Log
Every scan at your doors for this member: Access Point, Status (Granted or Denied), Deny Reason and Scanned At. This is the first place to look when a member says the door did not open. More entries load as you scroll.
Requires: Access control
The access log fills in when your doors are connected through access points.
Common questions
Why is Total Spent lower than what the member paid? It only counts membership payments. Products sold at the POS are in Purchases.
Can I see members of my other facility? No, the list shows the facility you are working in. Switch facility to see the other one.
The card reader opens the wrong member or none. Make sure the number in RFID Tag matches what the reader types. See Codes, cards and QR.
Was this page helpful?
Related articles
Still stuck?
Write to us and we will get back to you within one working day.