Fiscal printer setup and daily use
Connect a Synergy or David fiscal printer so every cash and card sale prints a fiscal receipt, and run X and Z reports, stornos and the fiscal journal.
Every cash or card sale at your till must come with a fiscal receipt from an approved fiscal device. FitManager prints them for you. The POS and the kiosk queue one fiscal document per sale, and FitManager Control, the Windows app on the reception PC, prints it on the fiscal printer next to it and sends the receipt number back. Refunds are storno receipts, and the daily close is a Z report.
The printer does the fiscal work itself: the fiscal memory, the VAT calculation and the connection to the Public Revenue Office (УЈП). FitManager and Control only tell it what to print.
What you need
- A fiscal printer from an authorised manufacturer. Supported models:
- Synergy PF-500 / PF-550 (Akcent)
- David / Fiditek Expert SX and FX1300A
- The manufacturer's service to fiscalise the device and program it: the header (gym name, address, tax number), the VAT groups, the operator password and the clock. Ask them for three things you will need below: the operator number, the operator password, and which VAT letter carries which rate.
- A Windows PC at reception with FitManager Control installed and activated, and the POS System tab switched on. See Set up FitManager Control.
- A cable: the printer connects to the PC by RS-232 or USB. David devices need the STM32 virtual COM port driver, which the service provides.
- The Fiscal printing feature on your plan, and the Manage settings permission in FitManager.
Step 1: Register the printer in FitManager
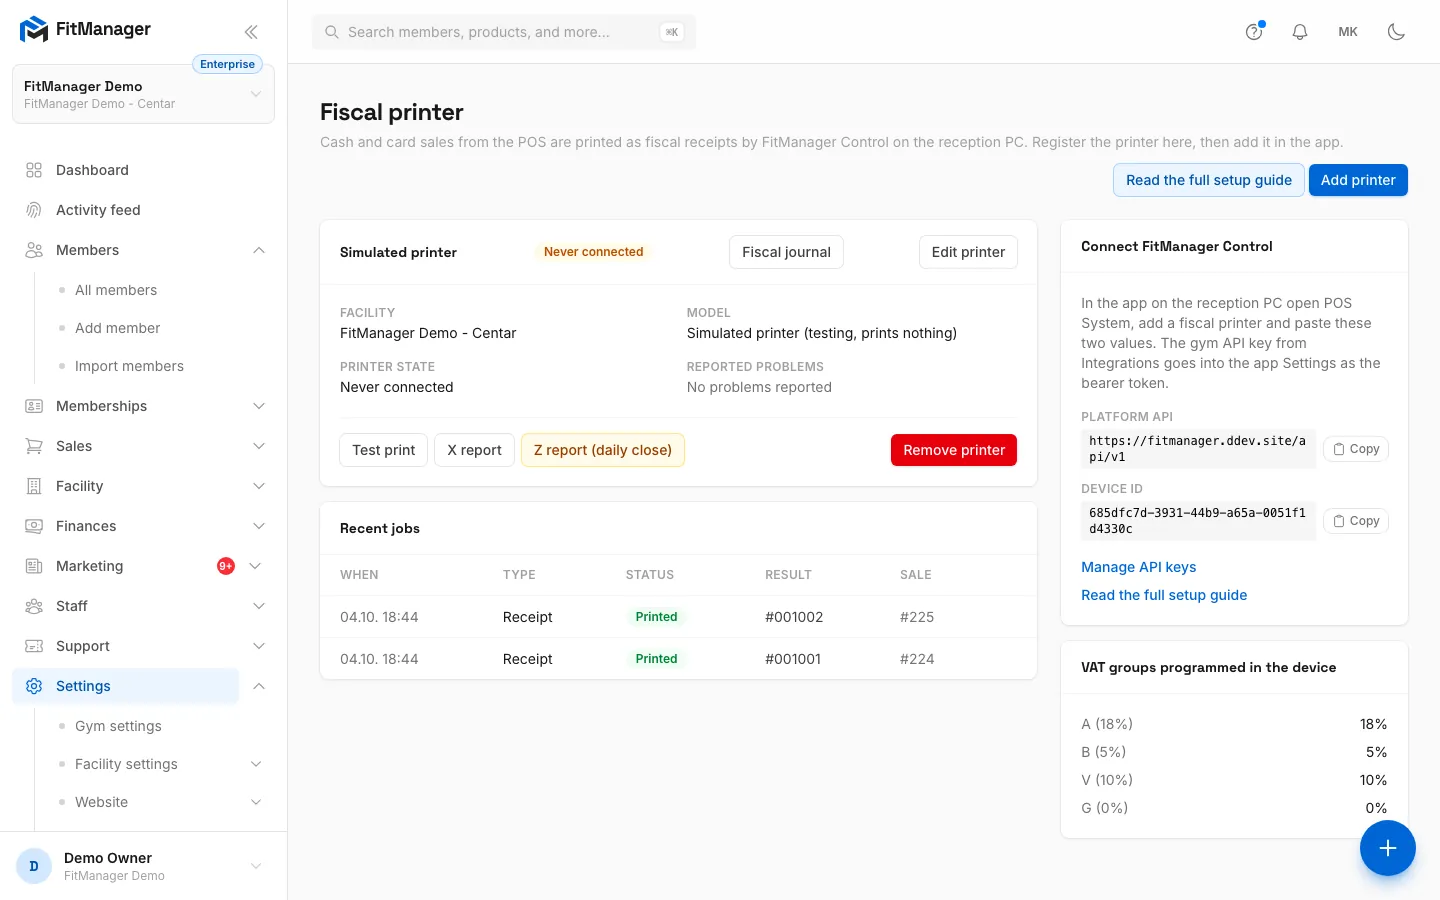
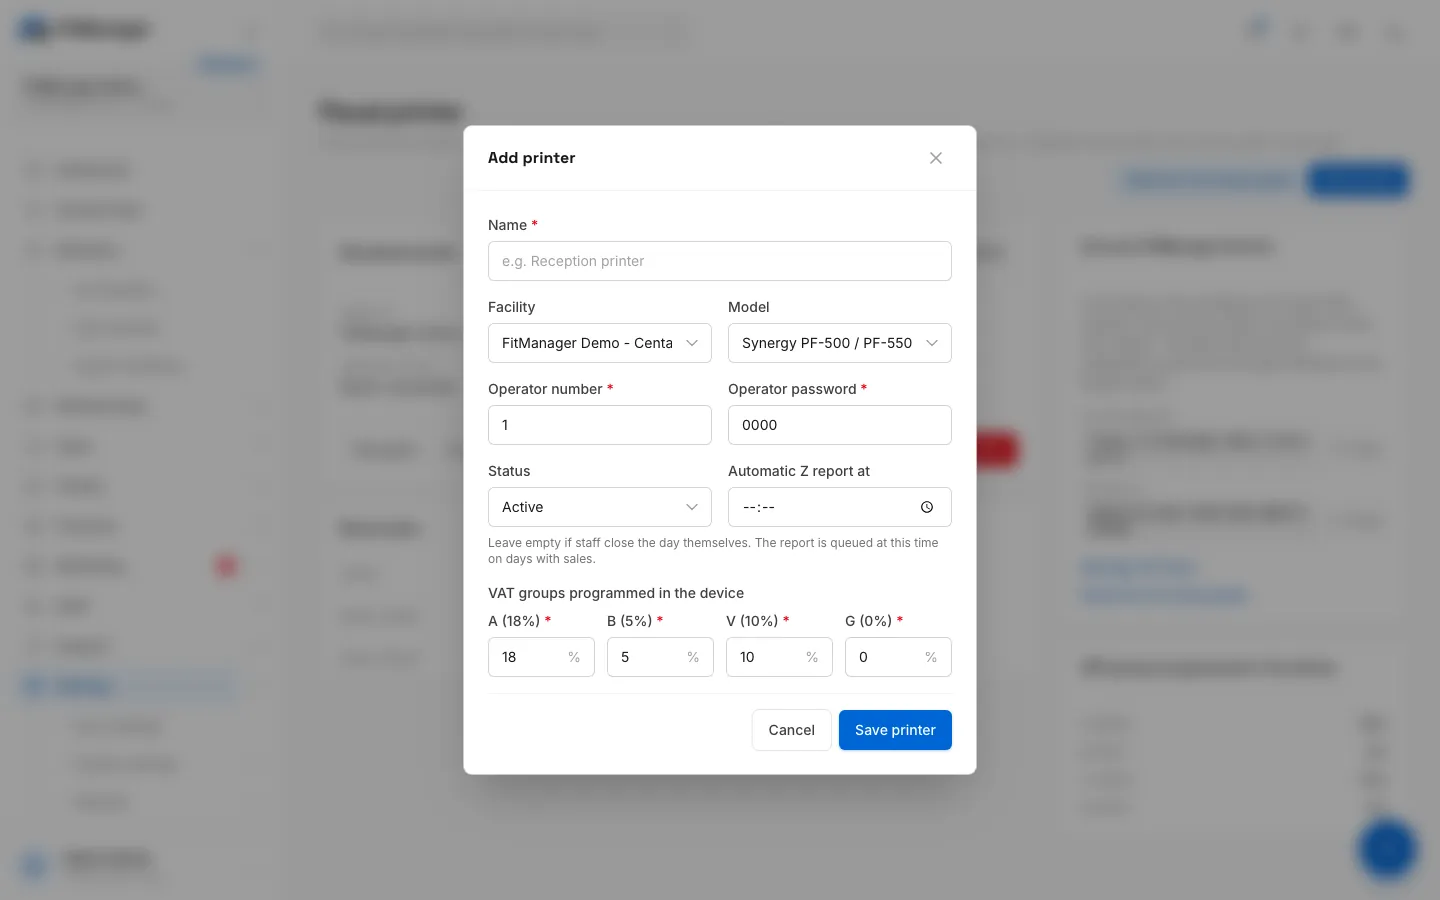
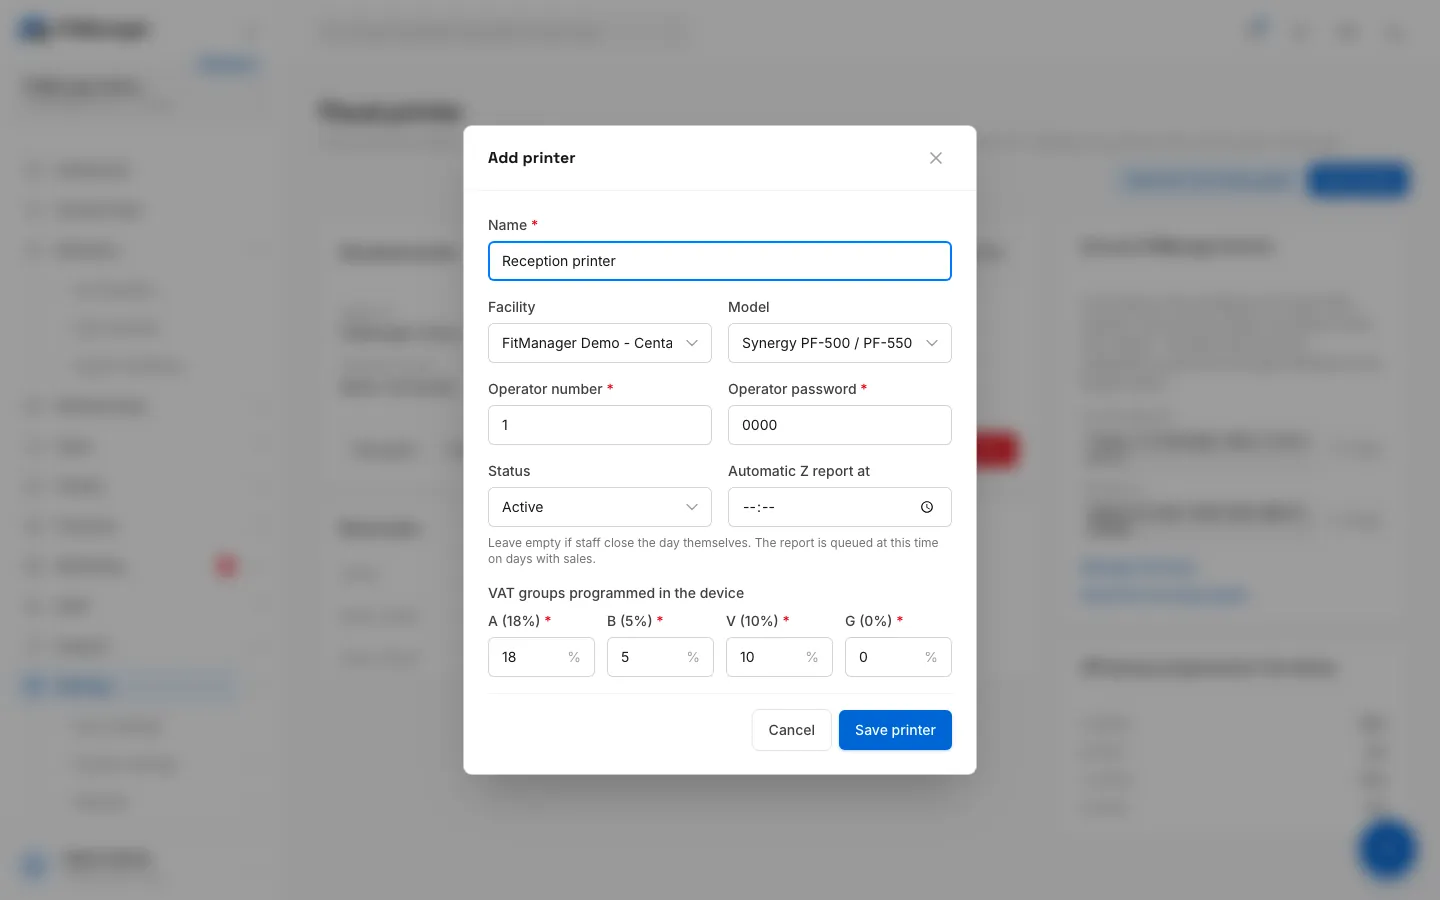
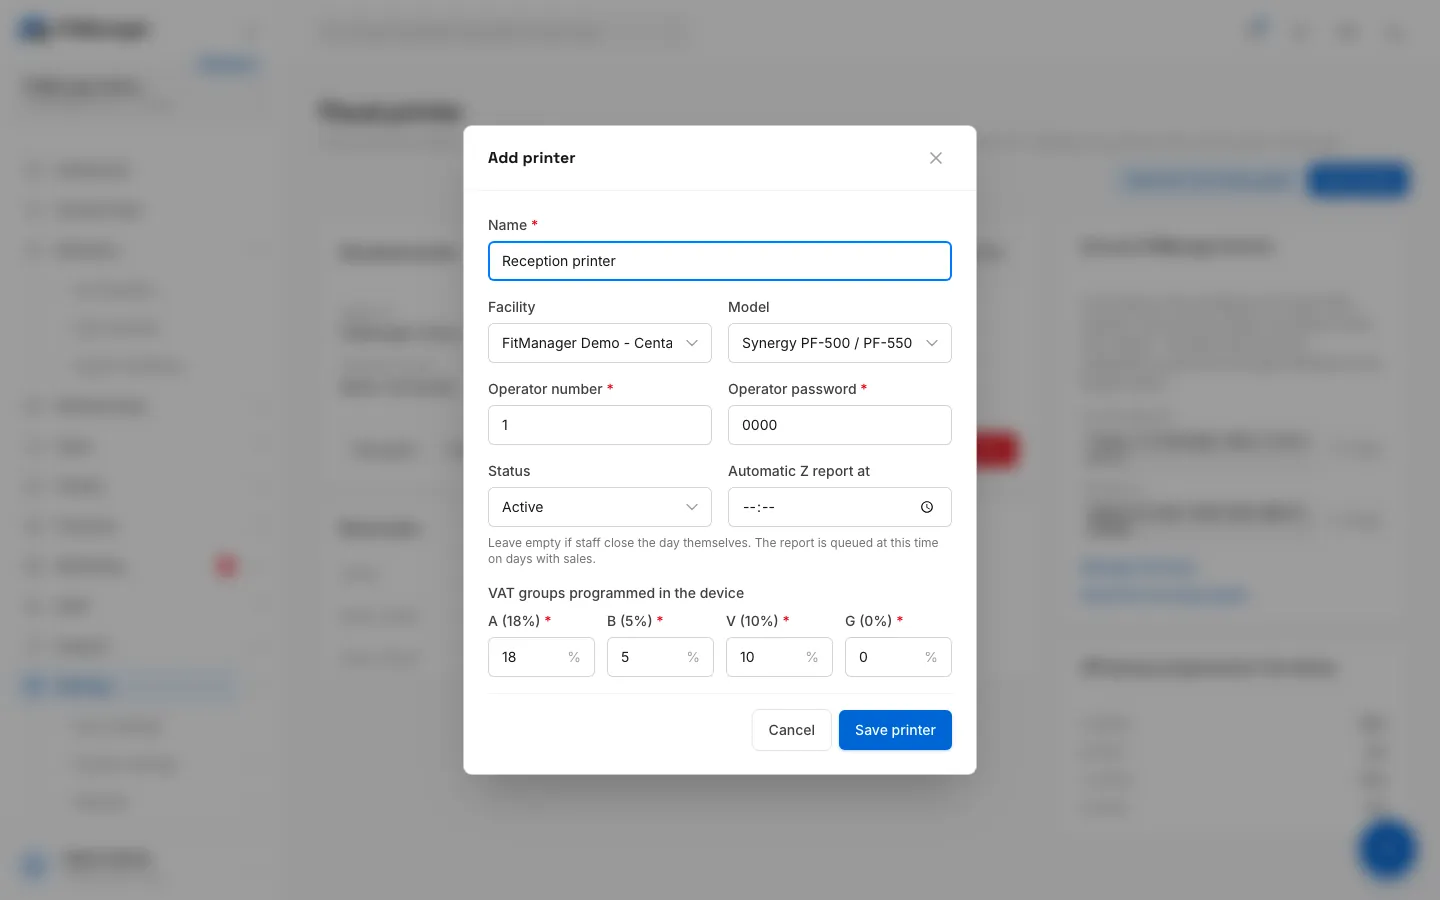
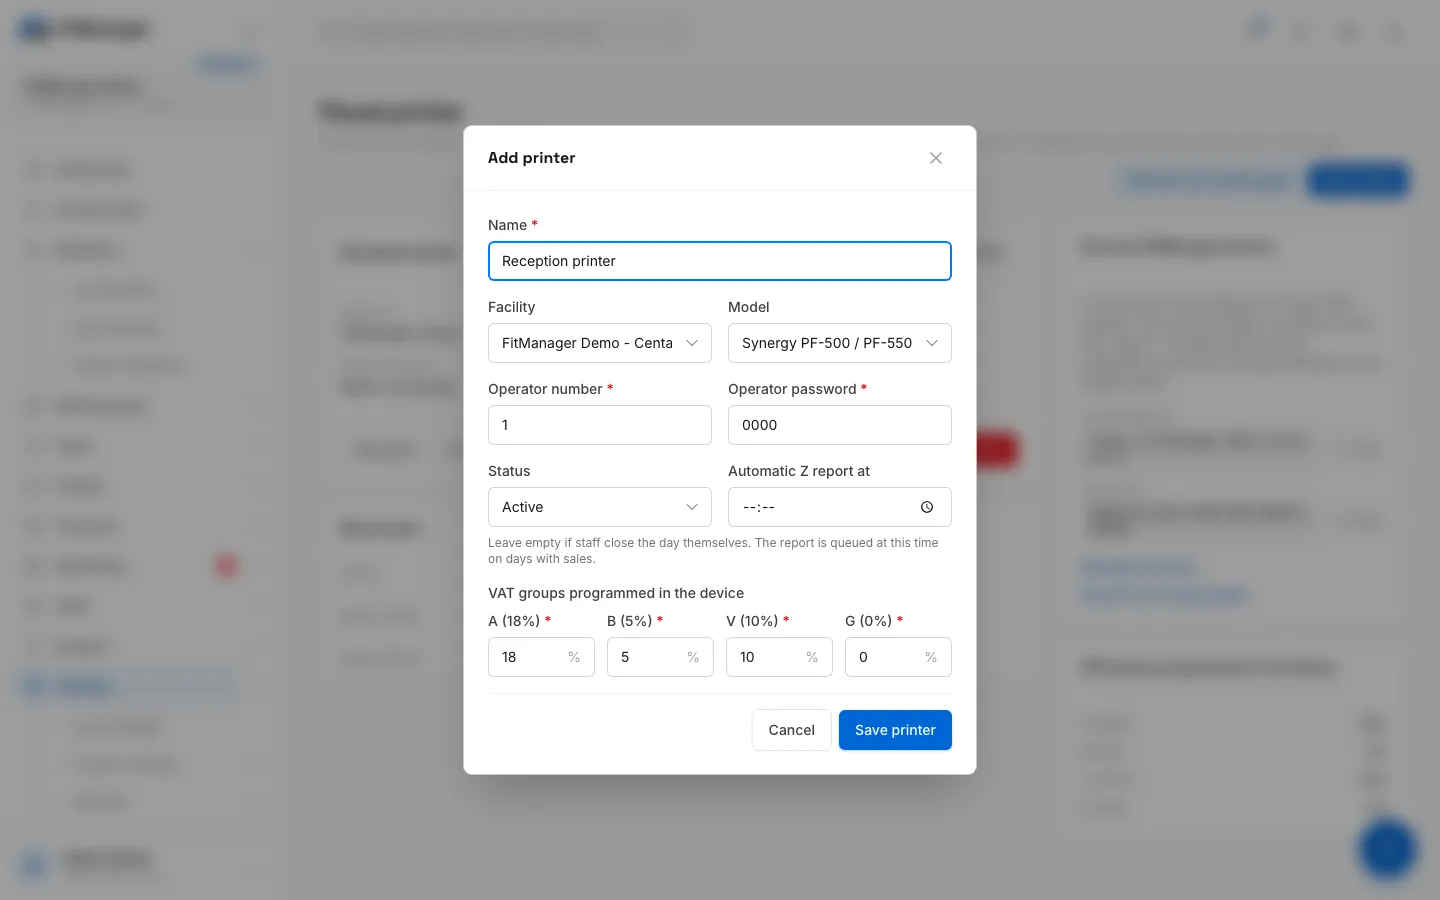
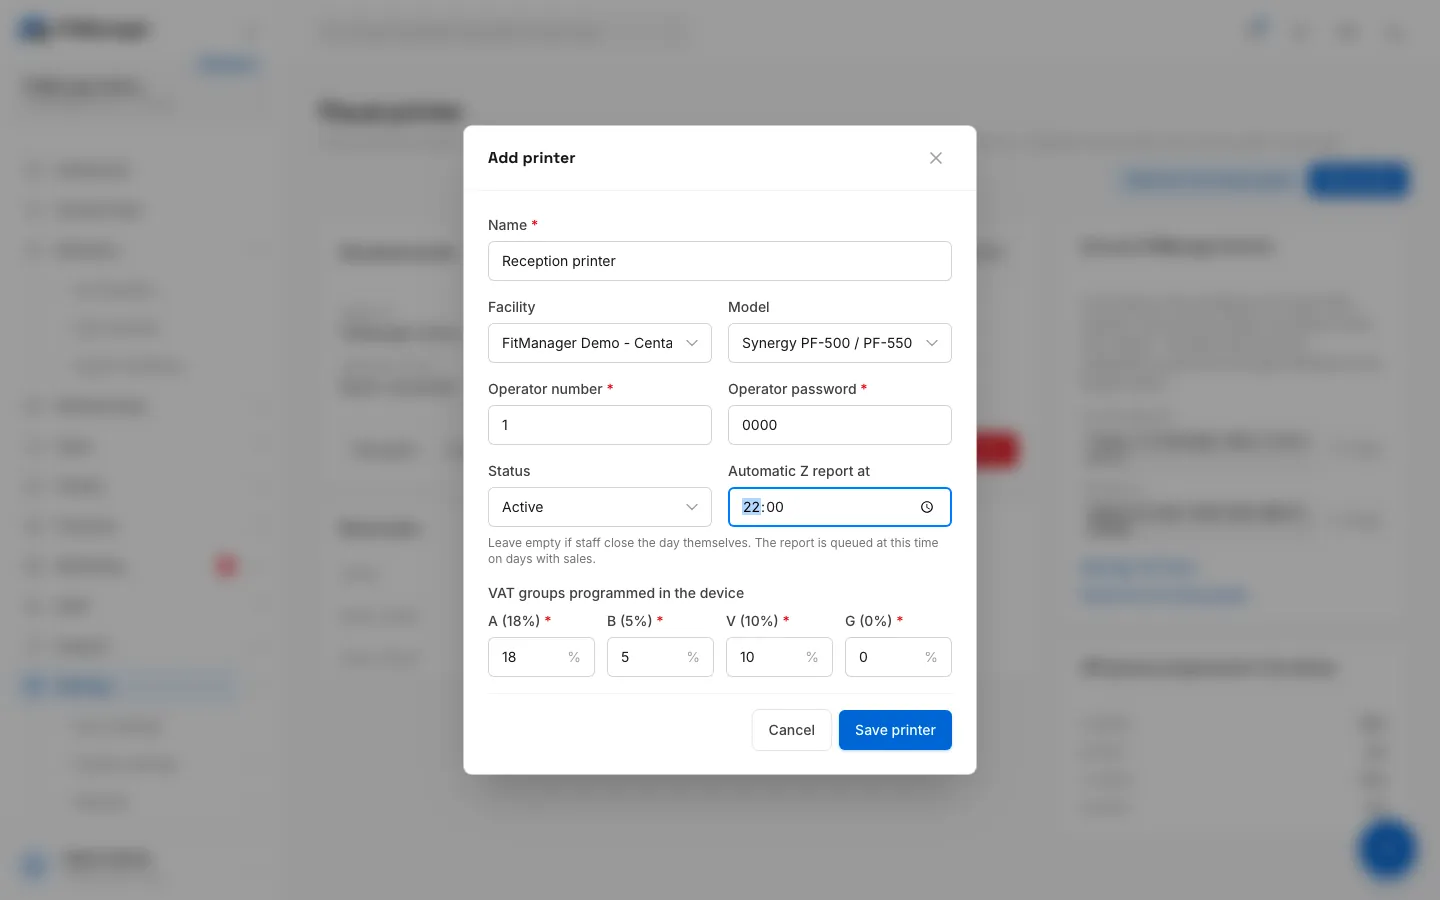
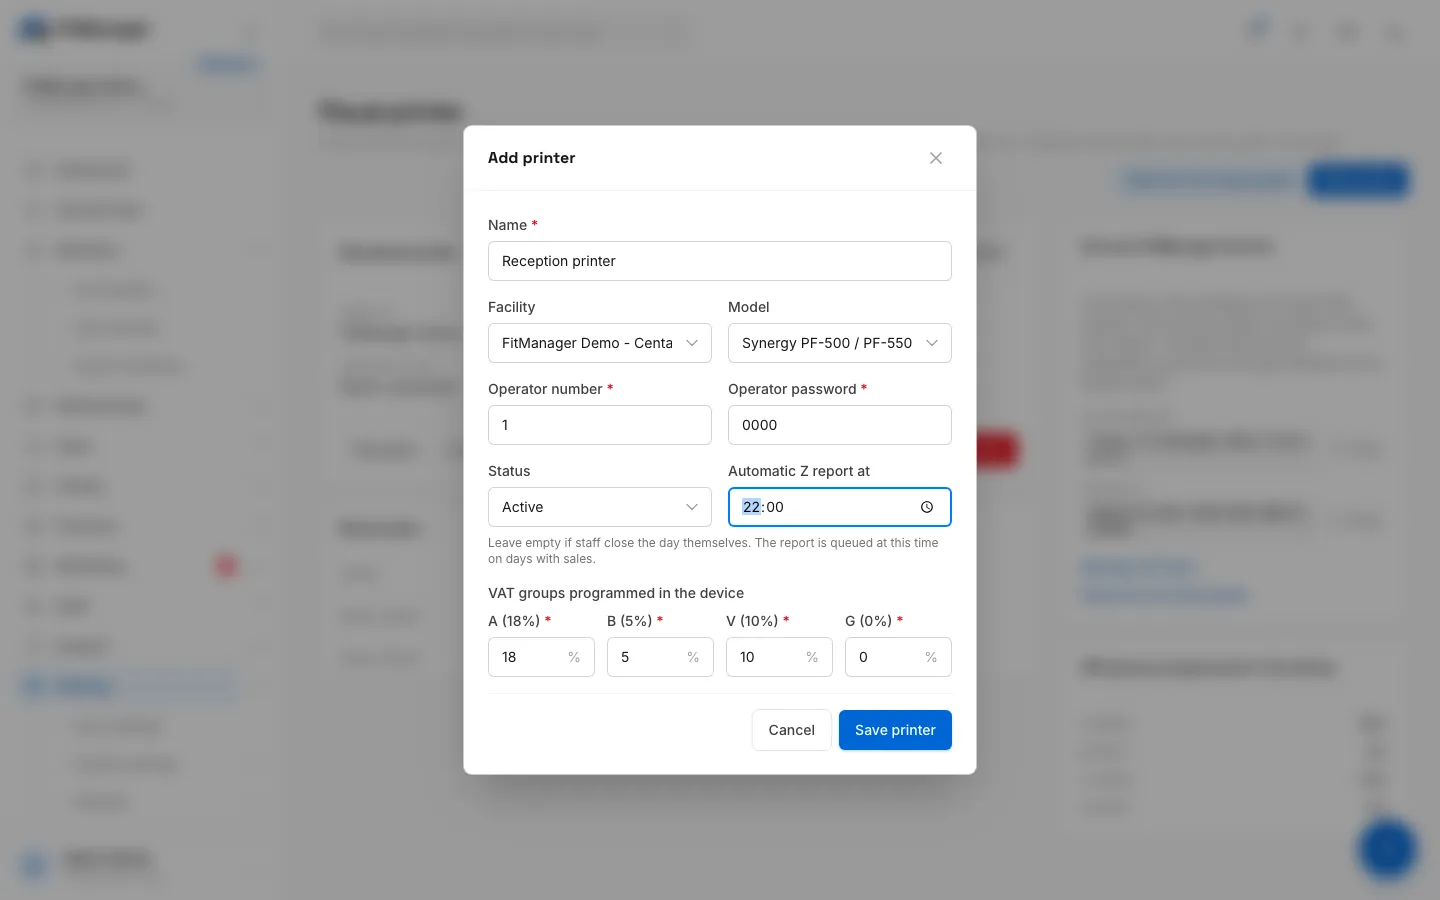
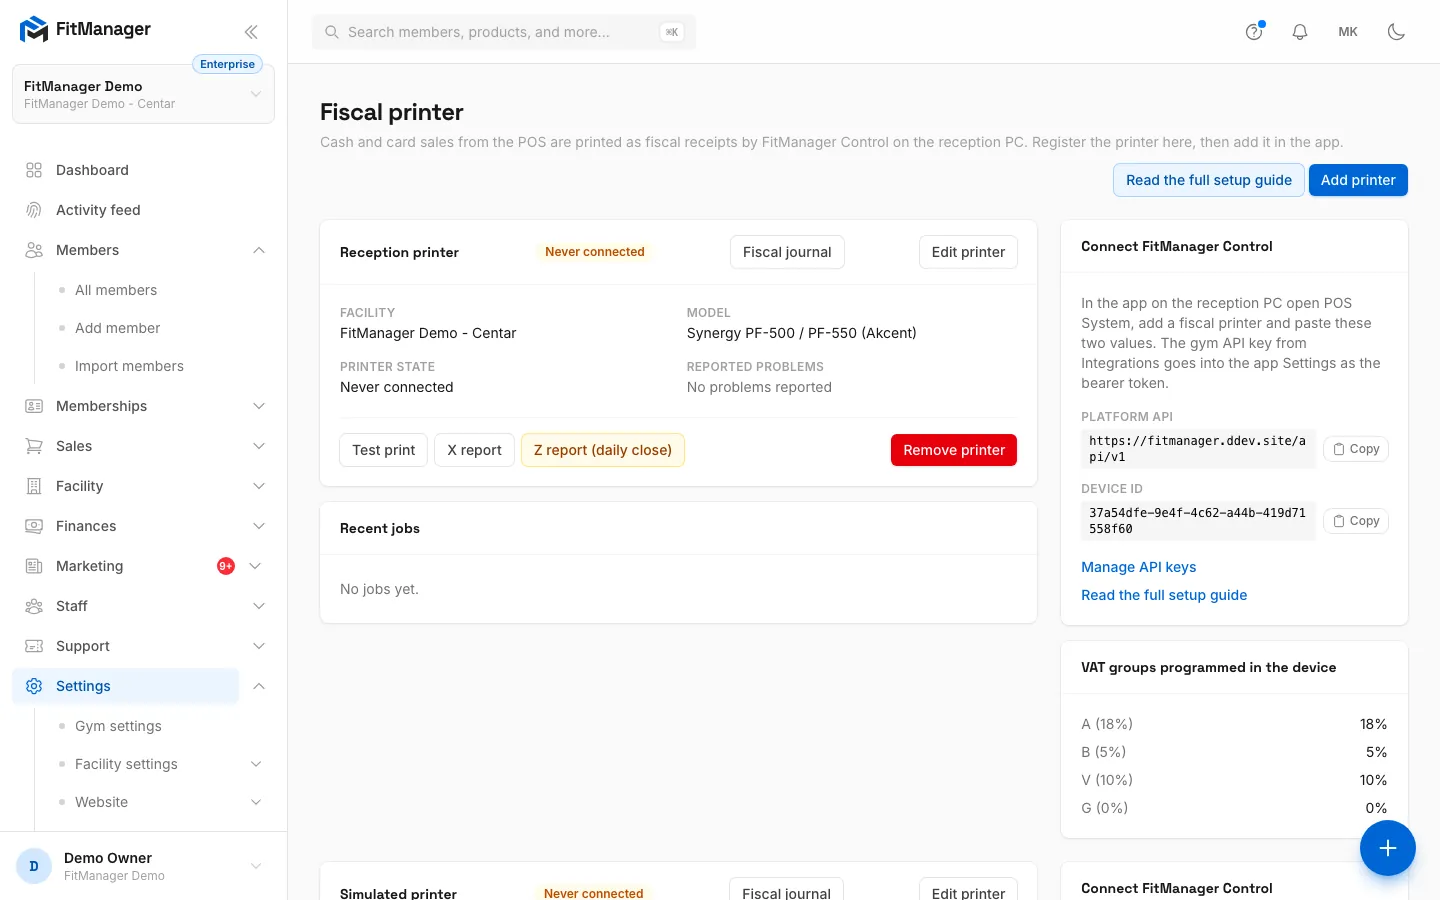
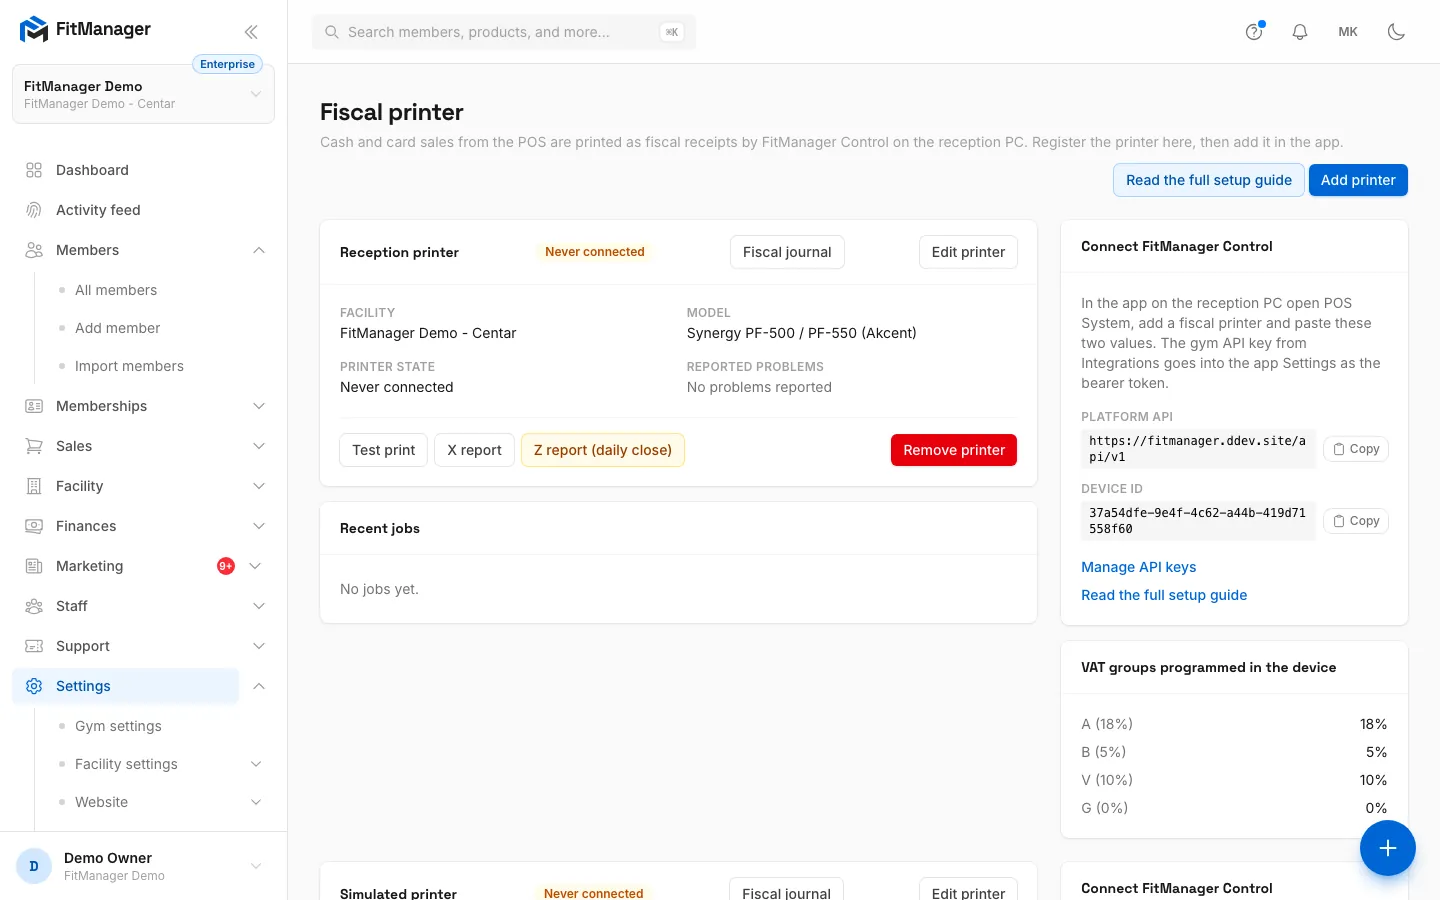
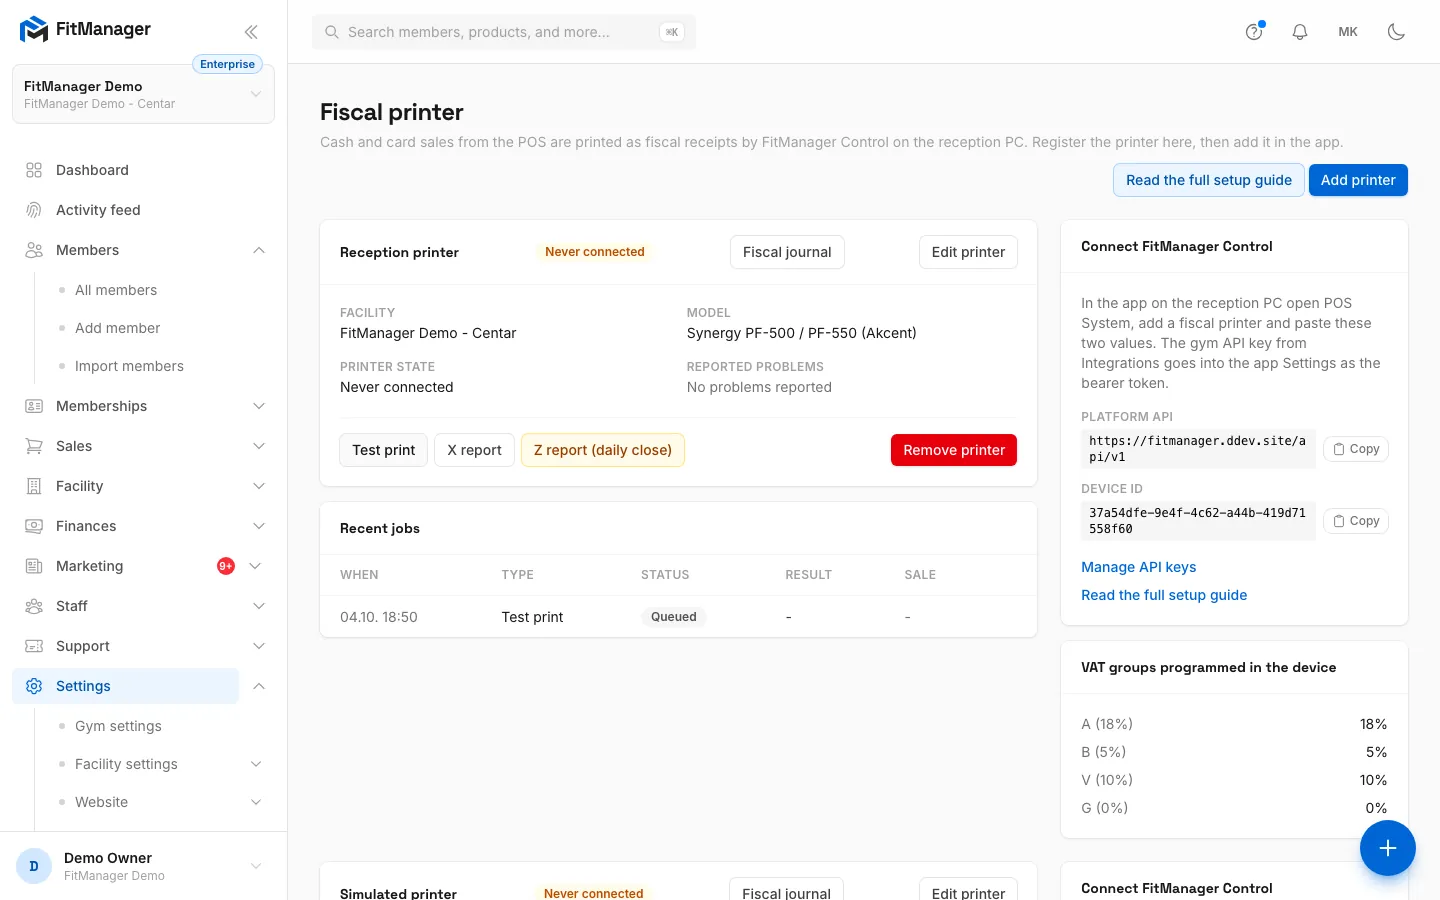
- Step 1: Under Settings, Integrations, Fiscal printer, click Add printer.
- Step 2: Give it a name your staff will recognise.
- Step 3: Pick the model. Synergy and David printers are supported.
- Step 4: Enter the operator number and password the service programmed. The defaults are 1 and 0000.
- Step 5: Optionally, set a time for the automatic Z report that closes the day.
- Step 6: Check that the four VAT groups match what the service programmed in the device.
- Step 7: Click Save printer.
- Step 8: Copy the Platform API and the Device id. You paste both into FitManager Control.
- Step 9: Once Control is connected, click Test print to check the whole chain.
- Step 10: Every job the printer gets is listed under Recent jobs, with its result.
- Open Settings, Integrations, Fiscal printer.
- Click Add printer.
- Fill in the form and click Save printer.
| Field | What to enter |
|---|---|
| Name | A name your staff recognise, for example Reception printer. |
| Facility | The facility whose sales print on it. |
| Model | Your printer model. Simulated printer (testing, prints nothing) lets you try everything without a device. |
| Operator number | From the service, 1 to 8. The default is 1. |
| Operator password | From the service, 4 to 6 digits. The default is 0000. Three wrong passwords lock the device until it is switched off and on. |
| Status | Active prints. Disabled stops new jobs for this printer. |
| Automatic Z report at | Optional. A time such as 22:00 when FitManager queues the daily Z report by itself. See The daily Z report. |
| VAT groups programmed in the device | The rate of each letter as programmed: A (18%), B (5%), V (10%), G (0%) by default. These are for your reference. The printer itself calculates the VAT. |
After saving, the printer's card shows a Connect FitManager Control box with two values to copy: the Platform API address and the Device id.
Step 2: Set the VAT group on what you sell
Every product, membership plan and subscription has a VAT group field that defaults to A. Open each one and choose the letter the service programmed for that kind of item.
- Products: Products
- Memberships and subscriptions: Create a plan
The letter is copied onto each sale, so changing it later does not change receipts already printed or their stornos.
Step 3: Create the API key
Control proves it belongs to your gym with an API key. Open Settings, Integrations, API integration, create a key and copy it. It is shown only once. If Control already has a key for your doors or the kiosk, use the same one. See Set up FitManager Control.
Step 4: Add the printer in FitManager Control
On the reception PC:
- Connect the printer to the PC, switch it on and load paper. A new COM port appears in Windows.
- In FitManager Control, click Settings, paste the API key into Gym API bearer token and save.
- Open the POS System tab and click + Fiscal printer.
- Fill in:
- Name and Printer model.
- Serial port: the new COM port, and the baud rate, 9600 unless the service changed it.
- Platform API and Device id: paste the two values from Step 1.
- Operator, Operator password and Till number, as programmed by the service (defaults 1, 0000 and 1).
- Tick Enabled (polls the platform for jobs).
- Click Save. Within a few seconds the card should say ready and show the last document number. Anything else is the printer's own message, such as no paper or cover open.
- Click Test print. A short non-fiscal receipt comes out, and the printer in FitManager shows Online.
Step 5: Check the POS settings
Open Settings, Facility settings, Point of sale:
- Print fiscal receipts must be on for receipts to print.
- Printer chooses which printer this facility's POS uses. With one printer, leave it on the first option.
Then make a small real sale in cash on the Point of Sale. The receipt prints, and the sale in Sales, Purchases shows the fiscal receipt number. Storno it from there to check that refunds print too.
Which sales get a receipt
| Sale | Fiscal receipt |
|---|---|
| POS sale paid in Cash or by Card, above zero | Yes, on the facility's POS printer. |
| Kiosk sale with the receipt set to the fiscal printer | Yes, on the printer chosen for that kiosk. See Self-service kiosk. |
| Online payment on your website or member portal | No. The card processor issues the payment record. |
| Sales made while Fiscal receipts is off | No. |
The sale is never held up by the printer. If the printer is out of paper, the receipt waits in the queue and prints when it is back, or fails and can be retried.
A coupon discount is spread as a percentage over the receipt lines. The printer rounds each line, so the printed total can differ from the sale total by a denar.
The printer card
Each printer on Settings, Integrations, Fiscal printer shows:
- Online, Offline or Never connected. Online means Control checked in within the last five minutes.
- Printer state: when it was last seen and the Last document number.
- Reported problems in the printer's own words, such as no paper, cover open, a receipt is open, clock not set or fiscal memory nearly full.
- Training mode: the device is not fiscalised yet when the service has not fiscalised it. Receipts printed in training mode are not fiscal.
- A warning Yesterday was not closed with a Z report. when that happened.
The buttons on the card:
| Button | What it does |
|---|---|
| Test print | A non-fiscal test receipt. Safe at any time. |
| X report | Prints the day's totals so far without closing the day. |
| Z report (daily close) | Closes the fiscal day. Asks for confirmation first. |
| Fiscal journal | Opens every document this printer produced. |
| Edit printer / Remove printer | Change the settings, or remove it. Removing deletes its queued jobs. |
Recent jobs lists the last 15 jobs with the time, type, status, receipt number or error, and the sale. A failed job has a Retry button.
The daily Z report
The Z report writes the day into the fiscal memory. Print it once a day at closing time: without it the device eventually refuses to print receipts.
- By hand: click Z report (daily close) on the printer card or in the fiscal journal. Control can also print it from its own printer card.
- Automatically: set Automatic Z report at on the printer. At that time, on days that had sales and no Z report yet, FitManager queues one. The reception PC and Control have to be running at that time. If the PC is off, the report prints when it is next switched on.
The fiscal journal
Click Fiscal journal on a printer card to see every document it printed, grouped by day, newest first.
- Filter by From and To (the last 30 days by default), by type and by status. The filters stay in the address, so you can bookmark a view.
- Each day shows the number of receipts and stornos and the day's total, with stornos subtracted, plus Day closed (Z) or Day not closed.
- Failed jobs nobody has dealt with are highlighted and counted at the top.
- Export CSV downloads the filtered list with the date, time, type, status, fiscal number, amount, payment, sale, cashier and error, for your accountant.
The actions on each document:
| Action | When | What it does |
|---|---|---|
| Storno (refund) | A printed receipt with no storno yet | Prints a storno and marks the sale Refunded once it has printed. |
| Copy | A printed receipt or storno | Prints a non-fiscal copy marked as a copy, with the original number. It does not touch the fiscal memory. |
| Retry | A failed job | Puts it back in the queue. |
| Mark handled | A failed job | For a job you dealt with on the device by hand. It stays failed but stops asking for attention. |
| Cancel | A queued job | Removes it from the queue. Not possible once Control has started printing it. |
Refunds
Refunds are always storno receipts: a printed receipt is never edited. Open the sale under Sales, Purchases and click Storno (refund), or use the fiscal journal. See Purchases, refunds and storno.
Switching receipts off for a while
If the printer is at the service, switch Print fiscal receipts off under Settings, Point of sale, or use the Fiscal receipts switch on the POS itself, which users with the Manage settings permission see while the printer is online. New sales are then recorded without a receipt. Stornos and reports still work. Remember to switch it back on.
When something goes wrong
| What you see | What to do |
|---|---|
| A receipt shows Failed with a reason | Fix the cause (paper, cover, cable, PC switched off), then click Retry on the sale or in the journal. |
| Fiscal printer is offline on the POS | Control has not checked in recently. Check the PC, Control and the internet connection. Receipts wait and print when it is back. |
| Never connected | Check the Device id, Platform API and Gym API bearer token in Control, and that Enabled is ticked. |
| A receipt is open | The last document was interrupted, for example by a power cut. Control closes it automatically before the next job. |
| Training mode, not fiscalised, fiscal memory full, RAM reset, clock not set, or a device locked after wrong passwords | These are for the manufacturer's service, not FitManager. |
Control never prints the same receipt twice. If the PC restarts in the middle of a job, it checks the printer's document counter before deciding whether to print again, and a result it could not send is kept and sent later.
Was this page helpful?
Related articles
Still stuck?
Write to us and we will get back to you within one working day.