Manage locker rooms and lockers
Keep track of your locker rooms and which member has which locker.
The Lockers page keeps a record of your locker rooms and of which member is using which locker, so the desk always knows who has a key and which lockers are free.
Before you start
You need the lockers.view permission. Owners have it. Open the page from Facility > Lockers.
Add a locker room
- Click Add Room.
- Enter a Room Name, for example "Men's Locker Room A".
- Choose the Gender: Male, Female or Mixed. This is a label for staff only and does not limit who you can assign a locker to.
- Optionally enter the Floor (free text, like "1" or "Ground") and the Capacity.
- Choose the Status, Active or Inactive.
- Click Create.
Each room card shows how many lockers are occupied out of the total, the capacity and the floor. Use Edit to change a room and Delete to remove it.
Deleting a room deletes its lockers
Delete Room also permanently deletes every locker in the room, along with who had them.
Adding lockers to a room
Capacity is only a number shown on the card. The dashboard does not yet have a way to add individual lockers to a room, so a new room shows No lockers found. Open a support ticket with the room name and how many lockers it has, and the FitManager team will add them.
Assign a locker
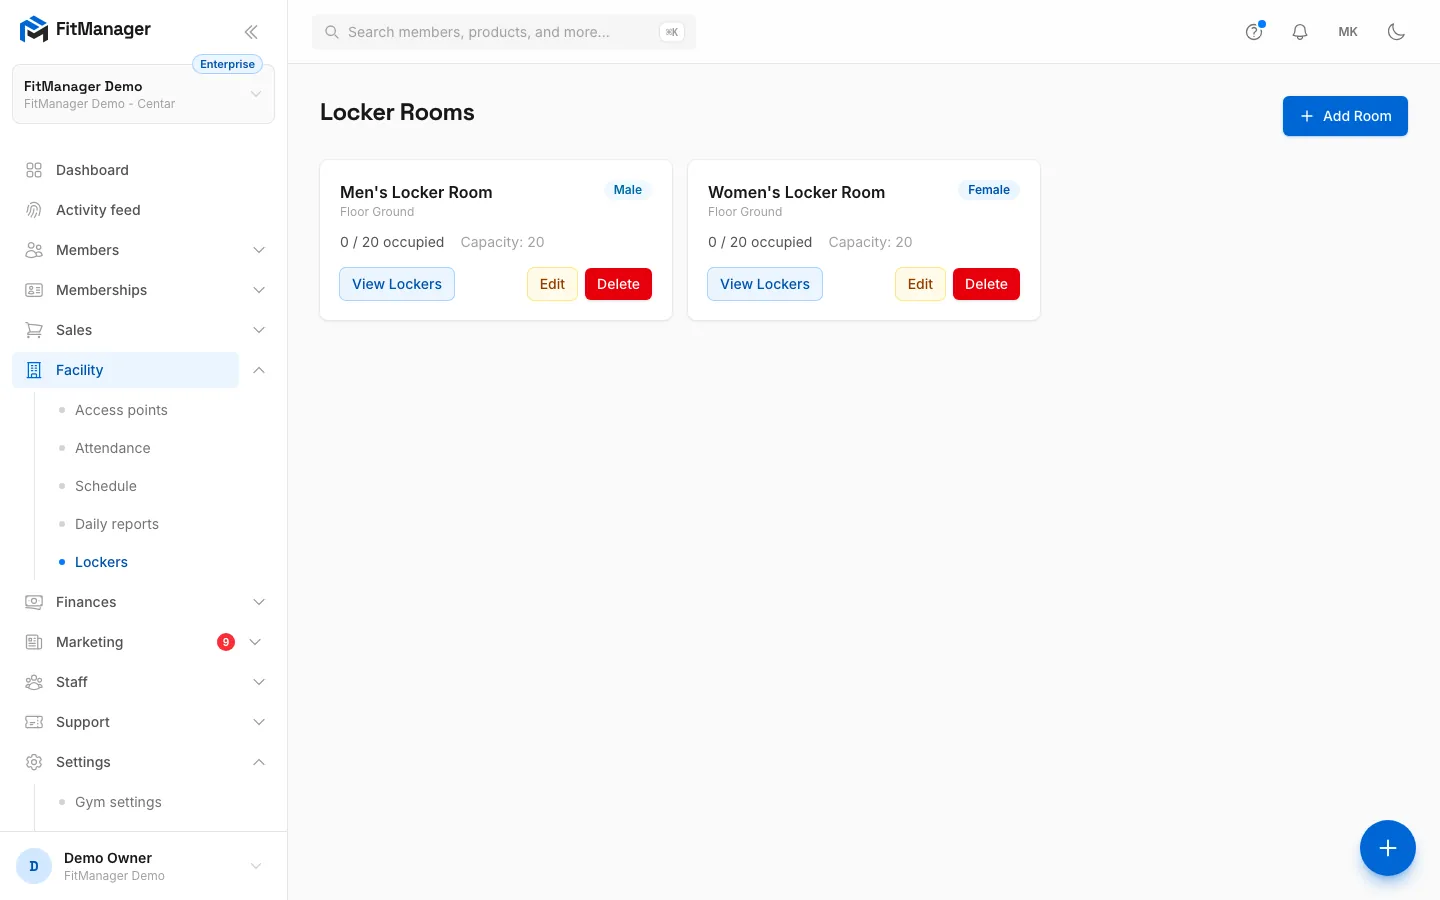
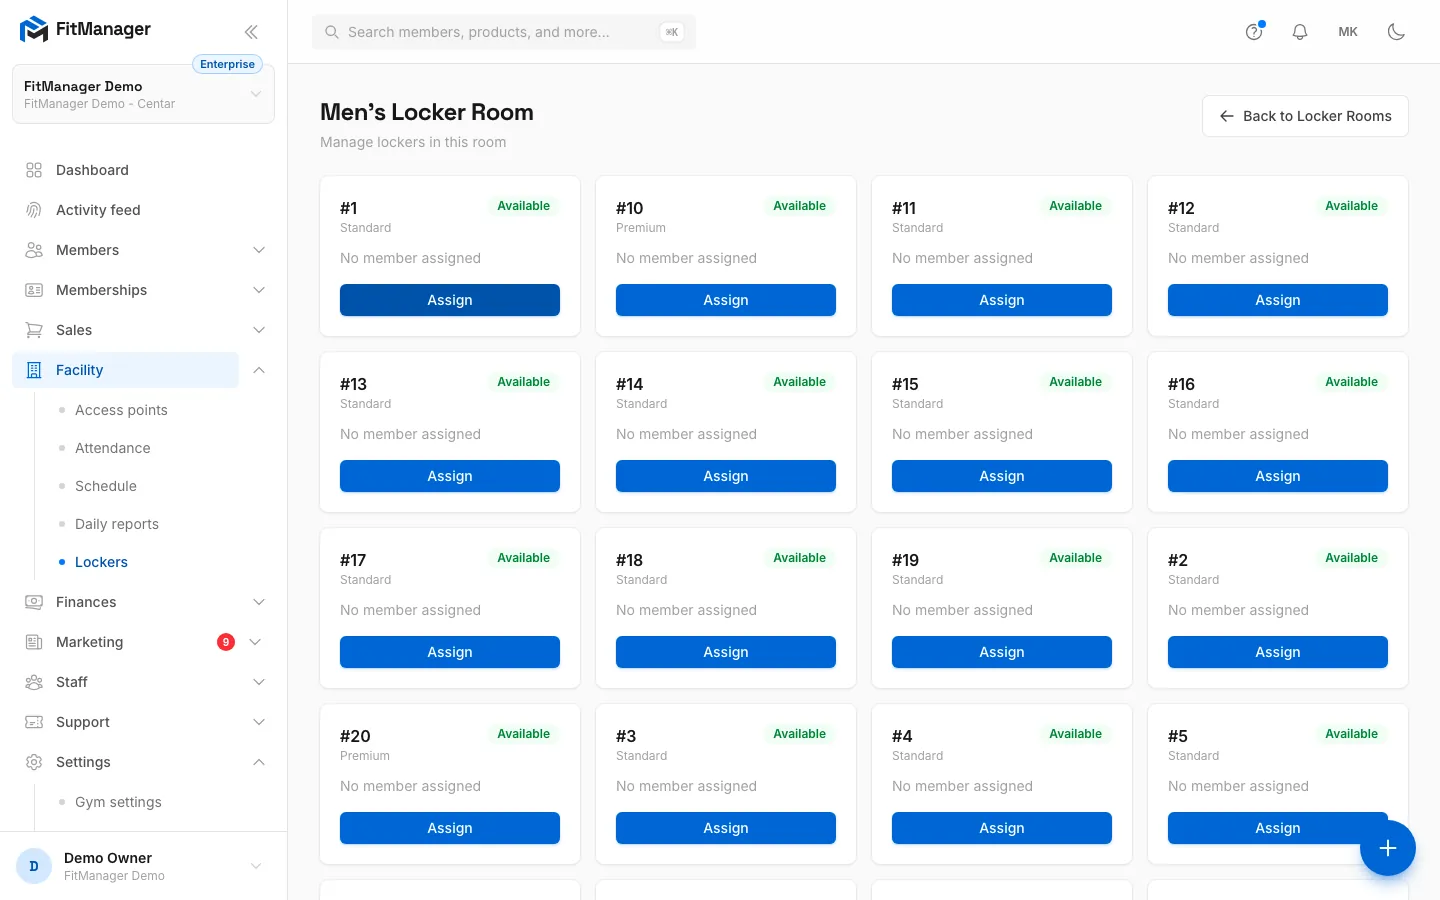
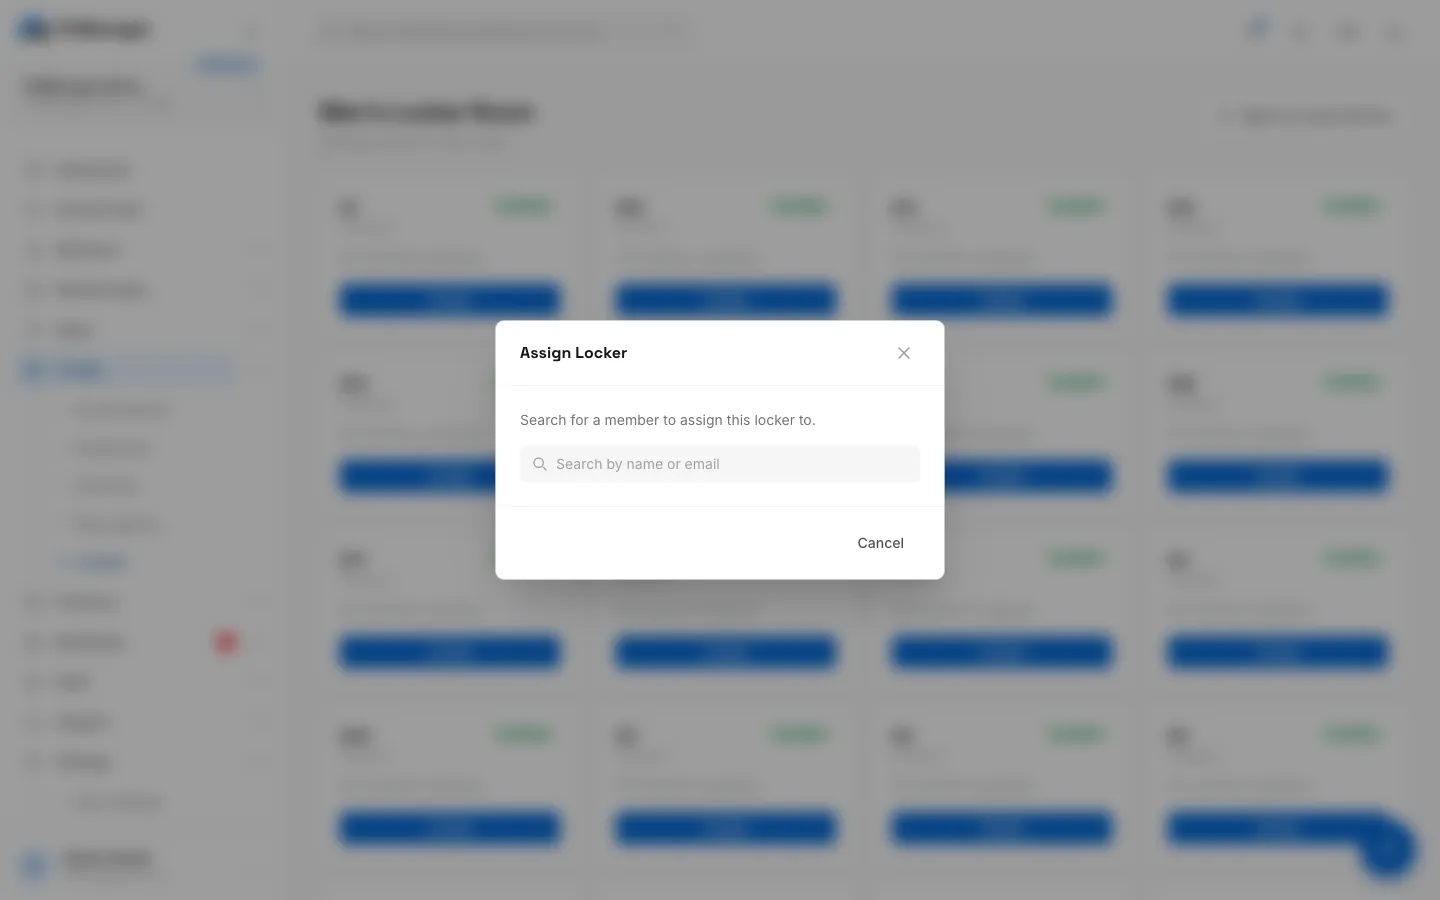
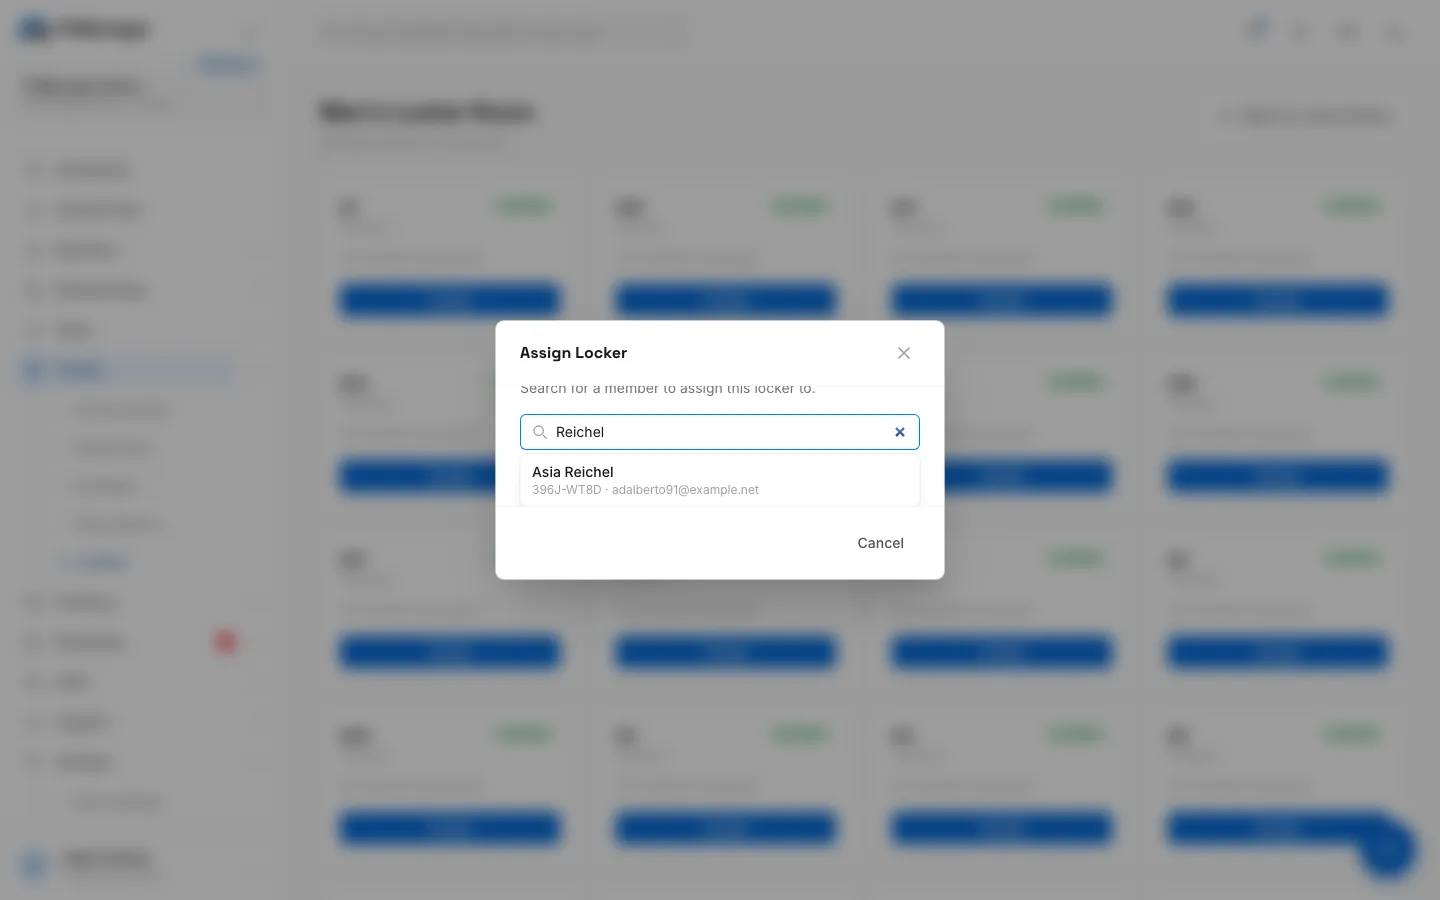
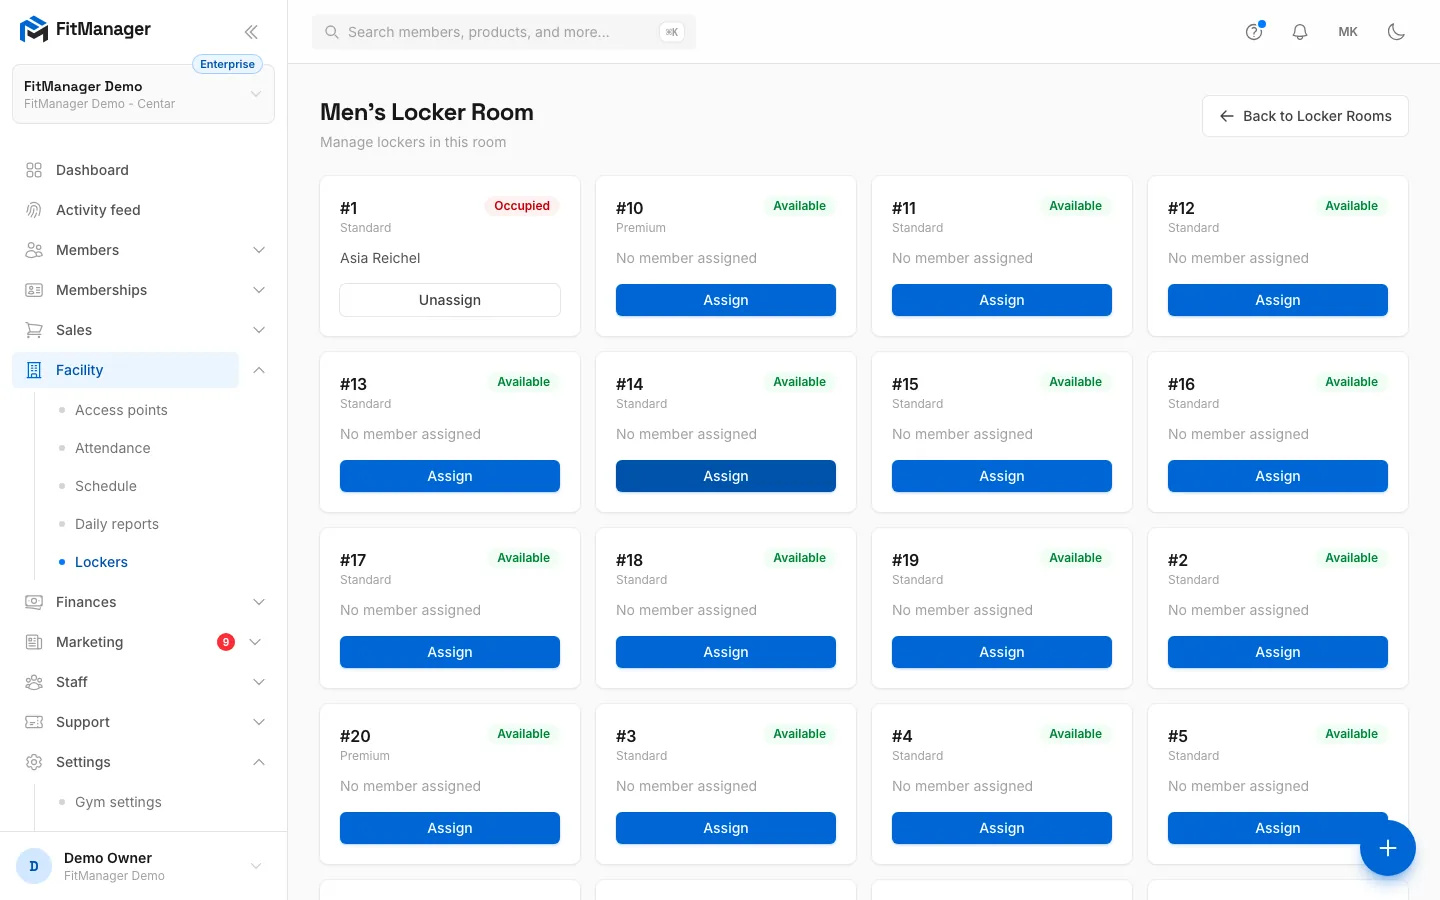
- Step 1: On the Lockers page, click View Lockers on a room.
- Step 2: Click Assign on an available locker.
- Step 3: Search for the member by name or email.
- Step 4: Click the member to assign the locker.
- Step 5: The locker shows as Occupied with the member's name.
- Step 6: When the member hands the key back, click Unassign to free the locker.
- Click View Lockers on a room.
- Find a locker marked Available and click Assign.
- Search for the member by name or email (at least two characters).
- Click the member in the results.
The locker turns Occupied and shows the member's name.
Free a locker
When the member hands the key back, click Unassign on the locker. It becomes Available again.
Locker statuses
| Status | Meaning |
|---|---|
| Available | Free. Shows the Assign button. |
| Occupied | In use by the member shown. Shows the Unassign button. |
| Reserved | Held back. It has no button and cannot be assigned. |
| Maintenance | Out of order. It has no button and cannot be assigned. |
Common questions
Can members see their locker in the portal?
No. Locker assignments are only visible to staff on this page.
Is a locker freed when the membership ends?
No. Lockers are not linked to memberships or to the doors, so free them by hand with Unassign.
Can I assign one member several lockers?
Yes. Nothing stops you from assigning more than one locker to the same member.
Was this page helpful?
Related articles
Still stuck?
Write to us and we will get back to you within one working day.